With Apache Royale and Electron you can publish your projects to desktop applications. In this guide you'll learn how to do that.
The short version is to create an Electron project, create an Apache Royale project inside of that and then point the Electron app to the generated Apache Royale html page. You then communicate through the ipcRenderer. We'll be using Visual Studio Code for this guide. The complete example project is attached at the end.
Prerequisites:
- Install Visual Studio Code – Link
- Install ActionScript & MXML plugin (required – also included in the extension pack below) – Link
- Install npm (required) – Link
- Install Apache Royale SDK (required) – Link
- Install Electron plugin – Link
- Install Firefox Debugger plugin – Link
- Install Git – Link
- Extension pack that includes AS3 & MXML plugin, AS3 projects and AS3 snippets – Link
Create an Electron project
A basic Electron application needs just these files:
- package.json – This points to the app's main file and lists its details and dependencies.
- main.js – Starts the app and creates a browser window to render HTML. This is the app's main process.
- index.html – A web page to render. This is the app's renderer process.
You also need a reference to an Electron development instance. This can be in the form of a /node_modules directory in your project or a reference to another external location. We will show two ways to reference it.
Creating a New Project
Visual Studio Code doesn't have a New Project menu option that you might be used to from using Flash Builder or other IDEs. Some extensions will set up new projects for you.
Instead you create a folder and define configuration files in the folder. Visual Studio Code then looks for those settings and uses them to set up the environment and provide code intelligence.
Open Visual Studio Code (if it is open already, create a new instance with Command + Shift + N or Control + Shift + N) and then click on Open Folder.
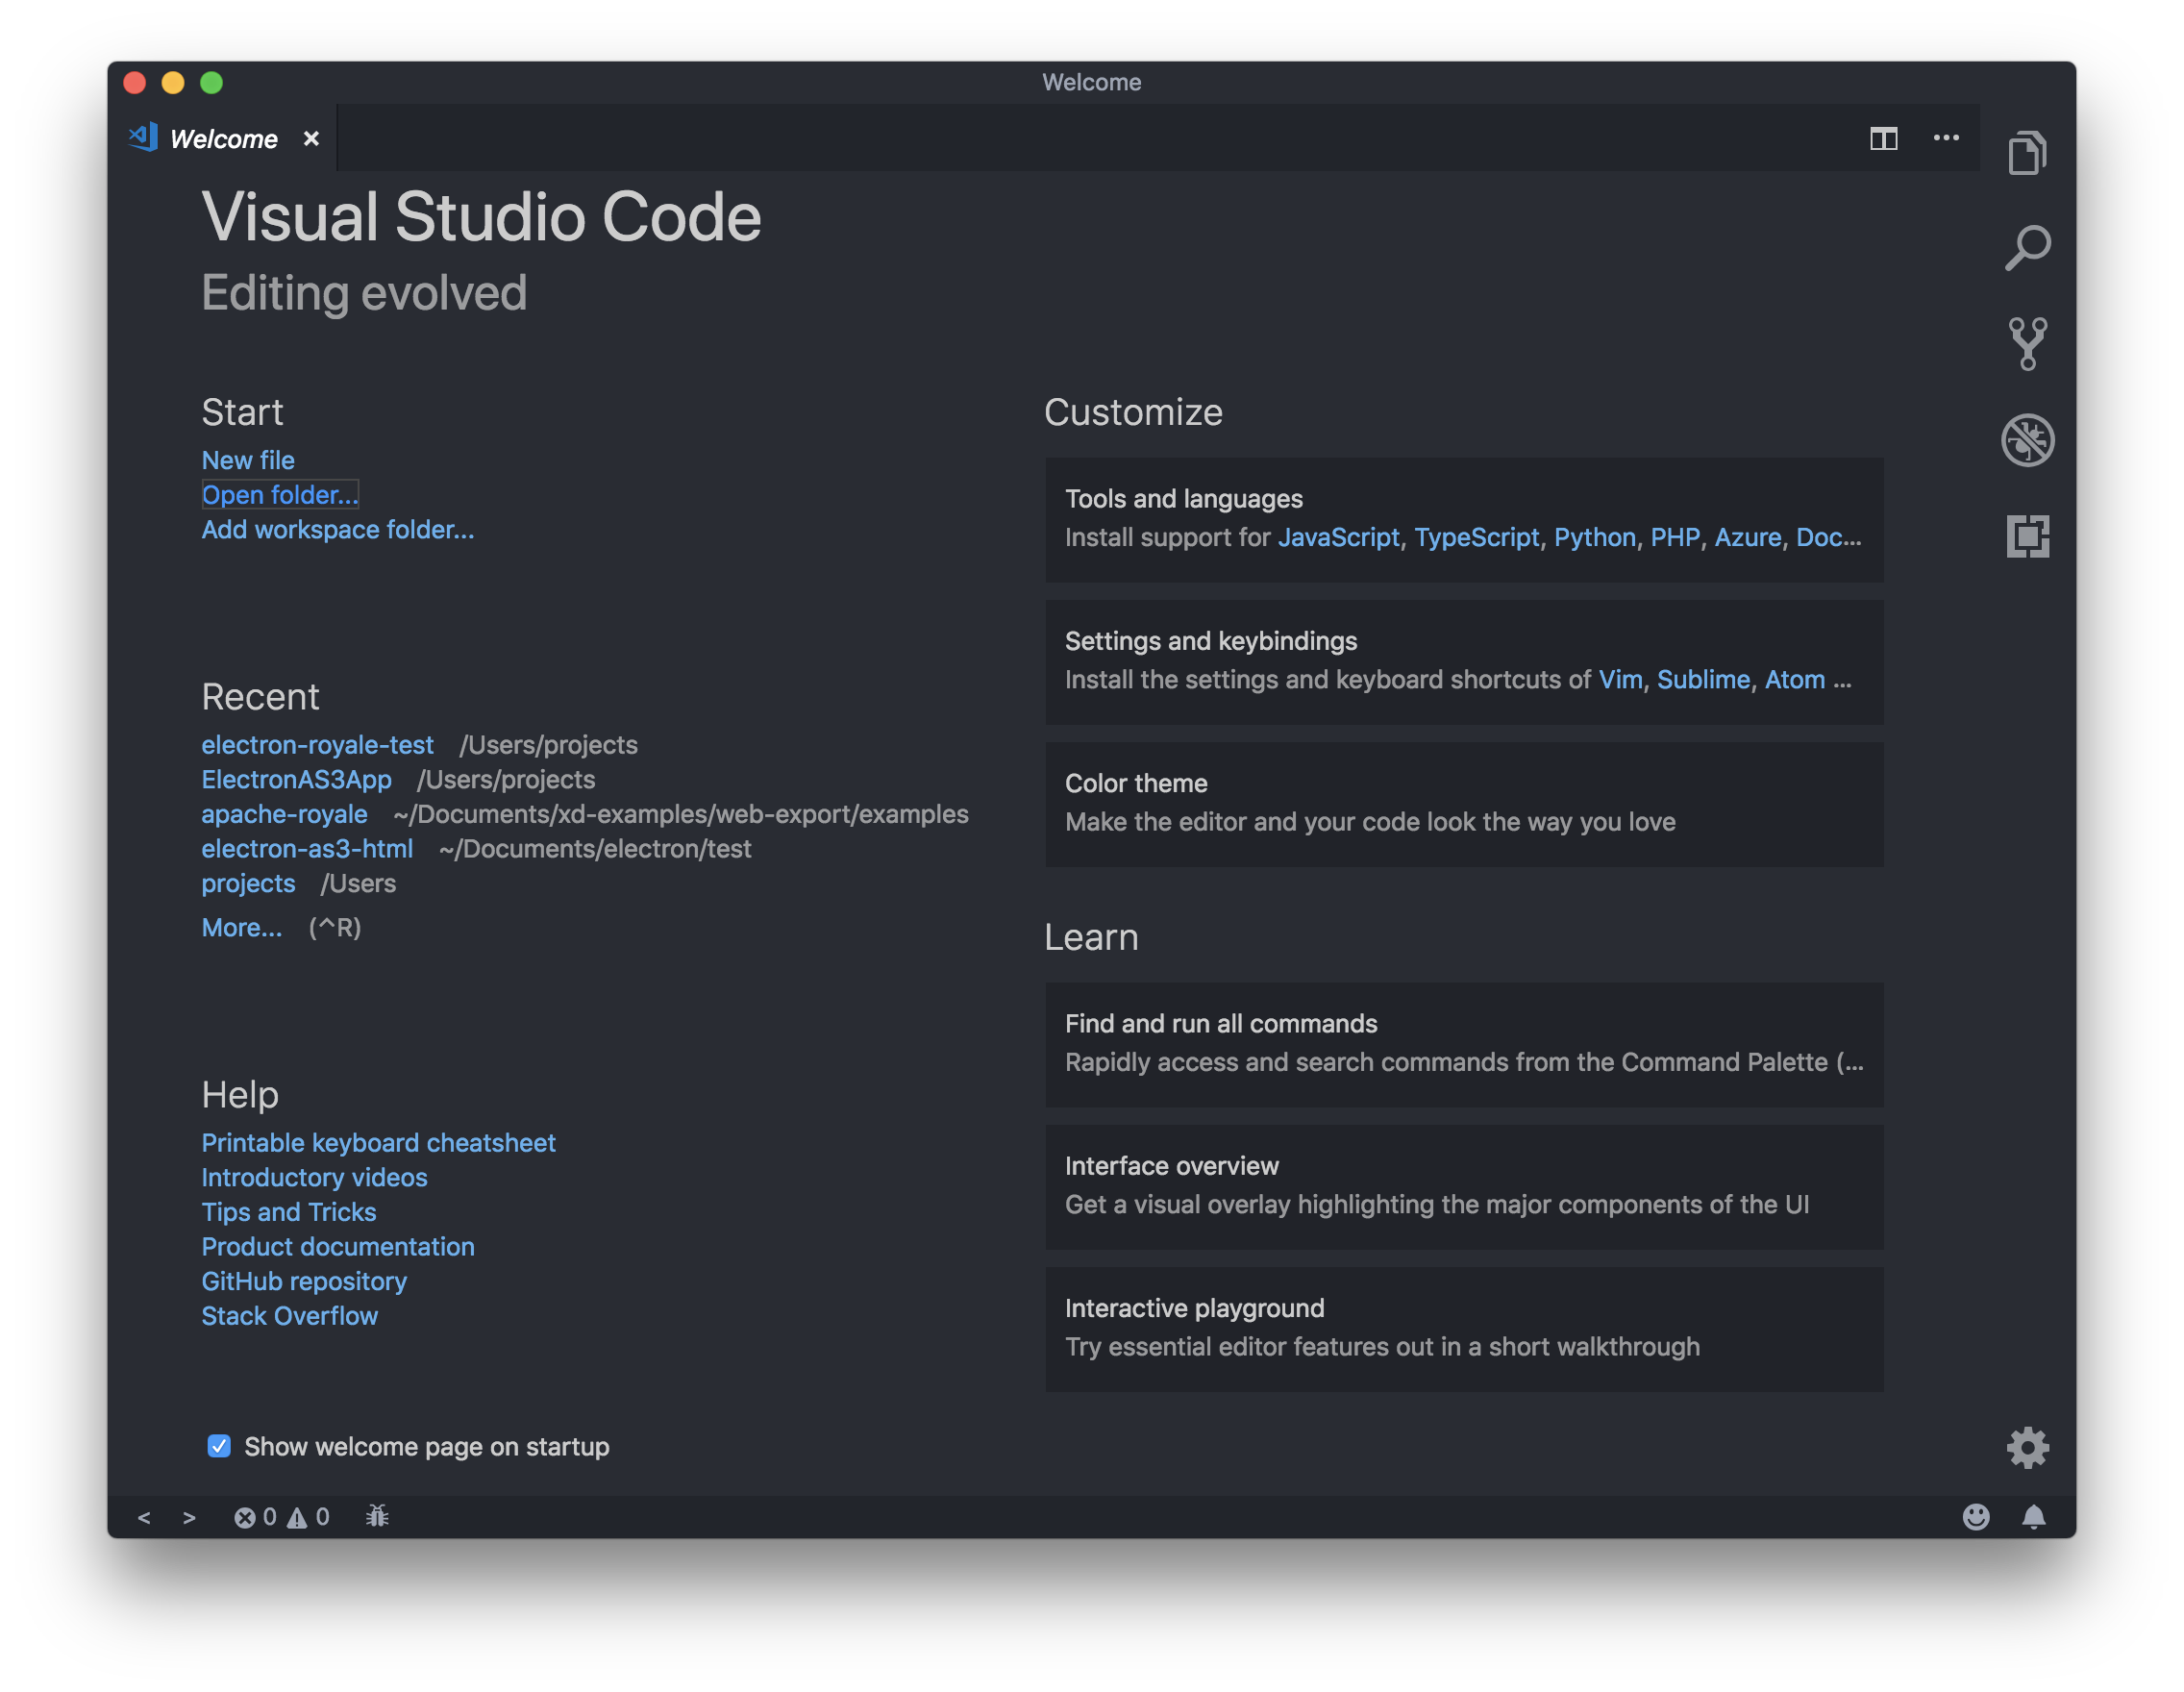
Create a new folder named "Electron-Royale", select it and then click Open.
A new Explorer section opens.
![]()
New Visual Studio Project (showing Welcome screen)
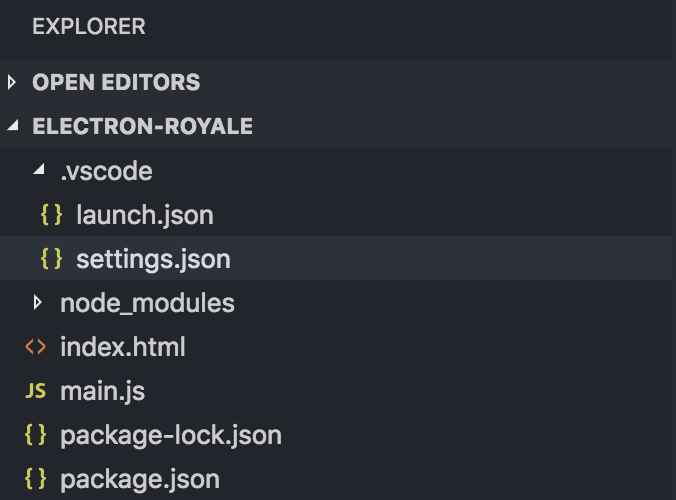
On the right side of the screen (or left) you see the Explorer section. Under that you the "Electron-Royale" area. That is our project folder.
In the heading are the New File, New Folder, Refresh and Collapse buttons. They appear when you hover the mouse pointer over the header area.
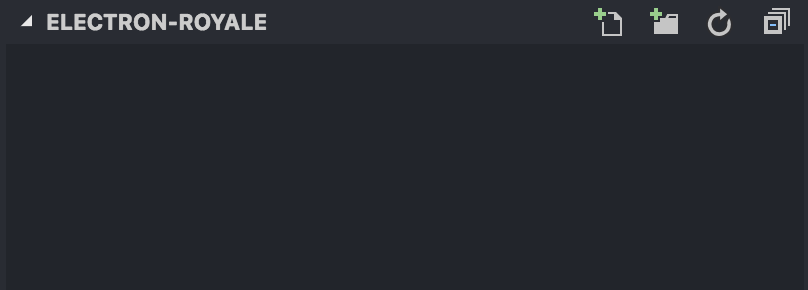
Project Folder
Open files appear in the Open Editors view:

Open Editors area
If the Welcome screen is still open, click the X button to close it.
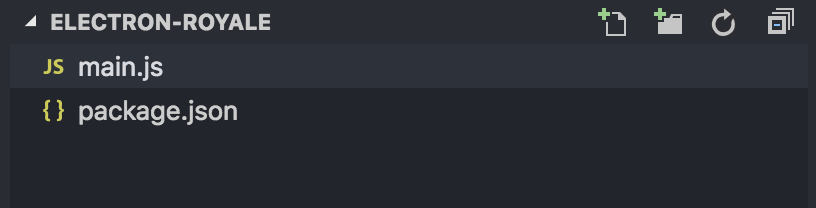
For an Electron app we create this folder structure:
your-app/
├── package.json
├── main.js
└── index.html
If you haven't created an Electron app before, read this short overview page and then return here.
There are extensions that can create the project for us but we're going to do it by hand for this guide. Why? You will be editing these options frequently until the project is set up.
Create the package.json in the root directory by clicking the New File button and adding the following:
{
   "name": "electron-royale-app",
   "version": "1.0.0",
   "description": "Electron and Royale",
   "main": "main.js",
   "scripts": {
      "start": "electron ."
   },
   "devDependencies": {
      "electron": "^5.0.1"
   }
}
You could also create the package.json project by using the npm init command.
Open a new Terminal window (built in to Visual Studio Code):
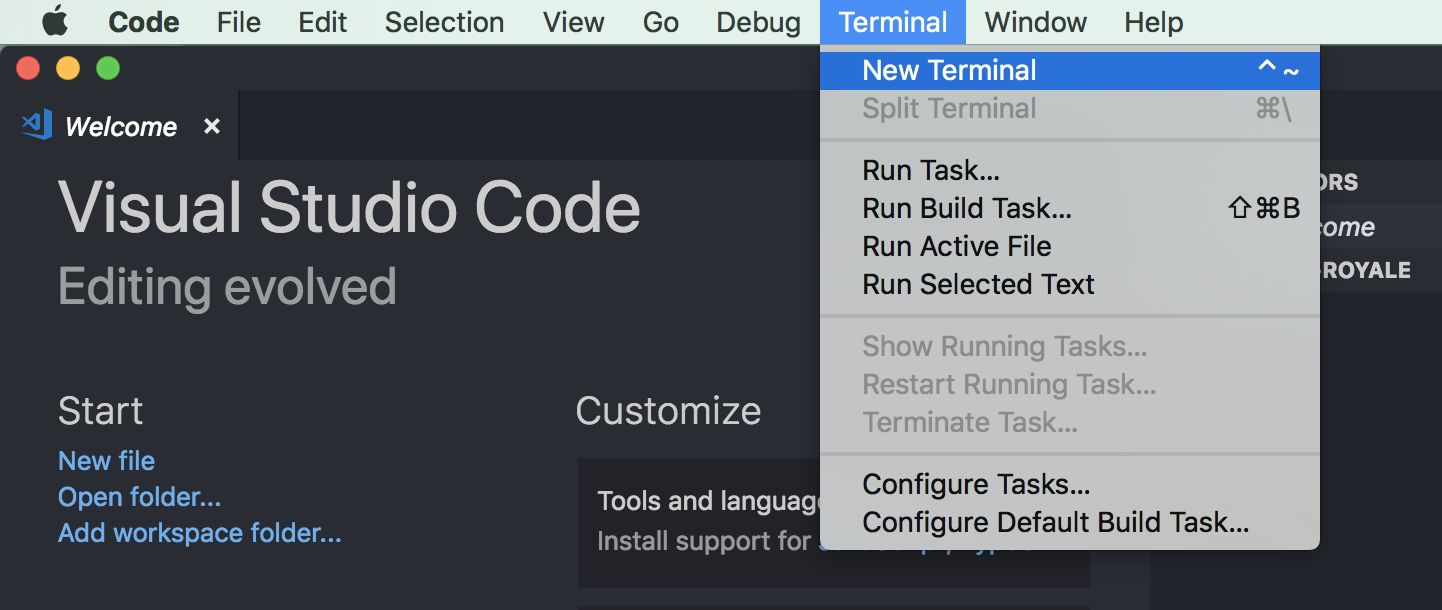
New Terminal Window
In the Window that opens enter the following command and follow the prompts:
npm initYou can simply press enter multiple times and type the values into the editor afterwards:
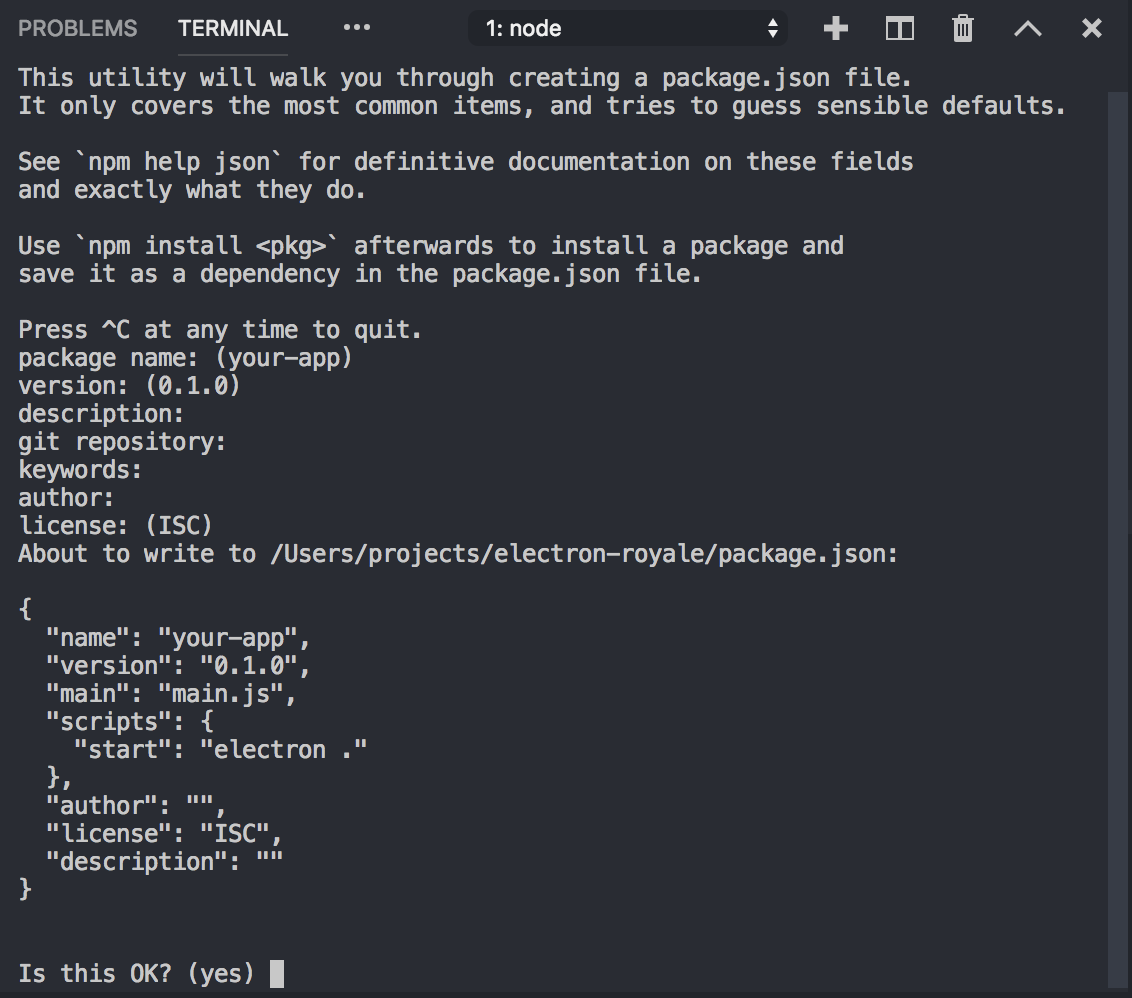
Prompts from npm init
Type yes to confirm. Visual Studio creates a new package.json file in the root directory. A few of the values will be different, so set them back to the values we have above.
Now we create the main Electron js file main.js. Note: There are other examples that use index.js instead.
Click the New File button and name the file main.js:
Main js
Again, read this overview page if you are new to Electron, and then return here.
Enter the following for main.js:
const { app, BrowserWindow } = require('electron')

// Keep a global reference of the window object. If you don't, the window will
// close automatically when the JavaScript object is garbage collected.
let win

function createWindow () {
  // Create the browser window.
  win = new BrowserWindow({
    width: 800,
    height: 600,
    webPreferences: {
      nodeIntegration: true
    }
  })

  // and load the index.html of the app.
  win.loadFile('index.html')

  // Open the DevTools.
  //win.webContents.openDevTools()

  // Emitted when the window is closed.
  win.on('closed', () => {
    // Dereference the window object, usually you would store windows
    // in an array if your app supports multi windows, this is the time
    // when you should delete the corresponding element.
    win = null
  })
}

// This method will be called when Electron has finished
// initialization and is ready to create browser windows.
// Some APIs can only be used after this event occurs.
app.on('ready', createWindow)

// Quit when all windows are closed.
app.on('window-all-closed', () => {
  // On macOS it is common for applications and their menu bar
  // to stay active until the user quits explicitly with Cmd + Q
  if (process.platform !== 'darwin') {
    app.quit()
  }
})

app.on('activate', () => {
  // On macOS it's common to re-create a window in the app when the
  // dock icon is clicked and there are no other windows open.
  if (win === null) {
    createWindow()
  }
})

// In this file you can include the rest of your app's specific main process
// code. You can also put them in separate files and require them here.
Note: Some code may be affected by the copy and paste process. If any code is encoded into HTML entities then you will see an error. Simply convert them back to the greater than or less than characters. Use the example project at the end for comparison.
We then need to create an HTML page to display in our Electron app.
Click the New File button, name it index.html and then enter the following value:
<!DOCTYPE html>
<html>
  <head>
    <meta charset="UTF-8">
    <title>Hello World!</title>
  </head>
  <body>
    <h1>Hello World!</h1>
    We are using node <script>document.write(process.versions.node)</script>,
    Chrome <script>document.write(process.versions.chrome)</script>,
    and Electron <script>document.write(process.versions.electron)</script>.
  </body>
</html>
We have one last step before running our project. We need the Electron node_modules folder (or a reference to it).
We can install this folder locally to our project or, if we've installed the Electron plugin, we can use that.
Let's use the extension first and then do it manually after.
Install the Electron plugin above and then click the Debug button that runs along the edge of Visual Studio Code. When you click it, it opens the Debug view:

Here you can launch different tasks, including debugging your application.
Click the No configurations dropdown list and you'll see Add Configuration. Click that.
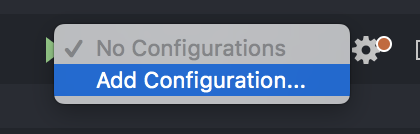
Add Configuration option
This will show a list of options, including one called Electron. Select this option.
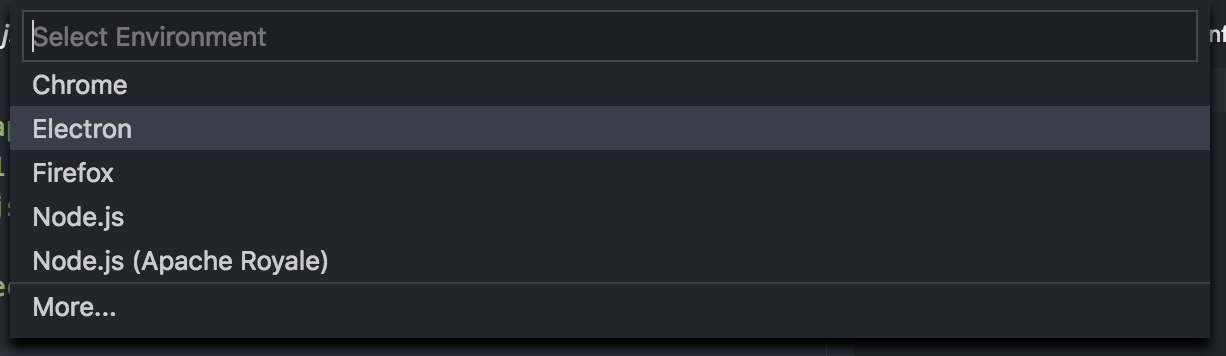
Electron Launch Configuration
When you select Electron from the dropdown list, a launch.json file is created and placed in a .vscode folder in the root of your project, and the launch.json file opens in an editor tab.
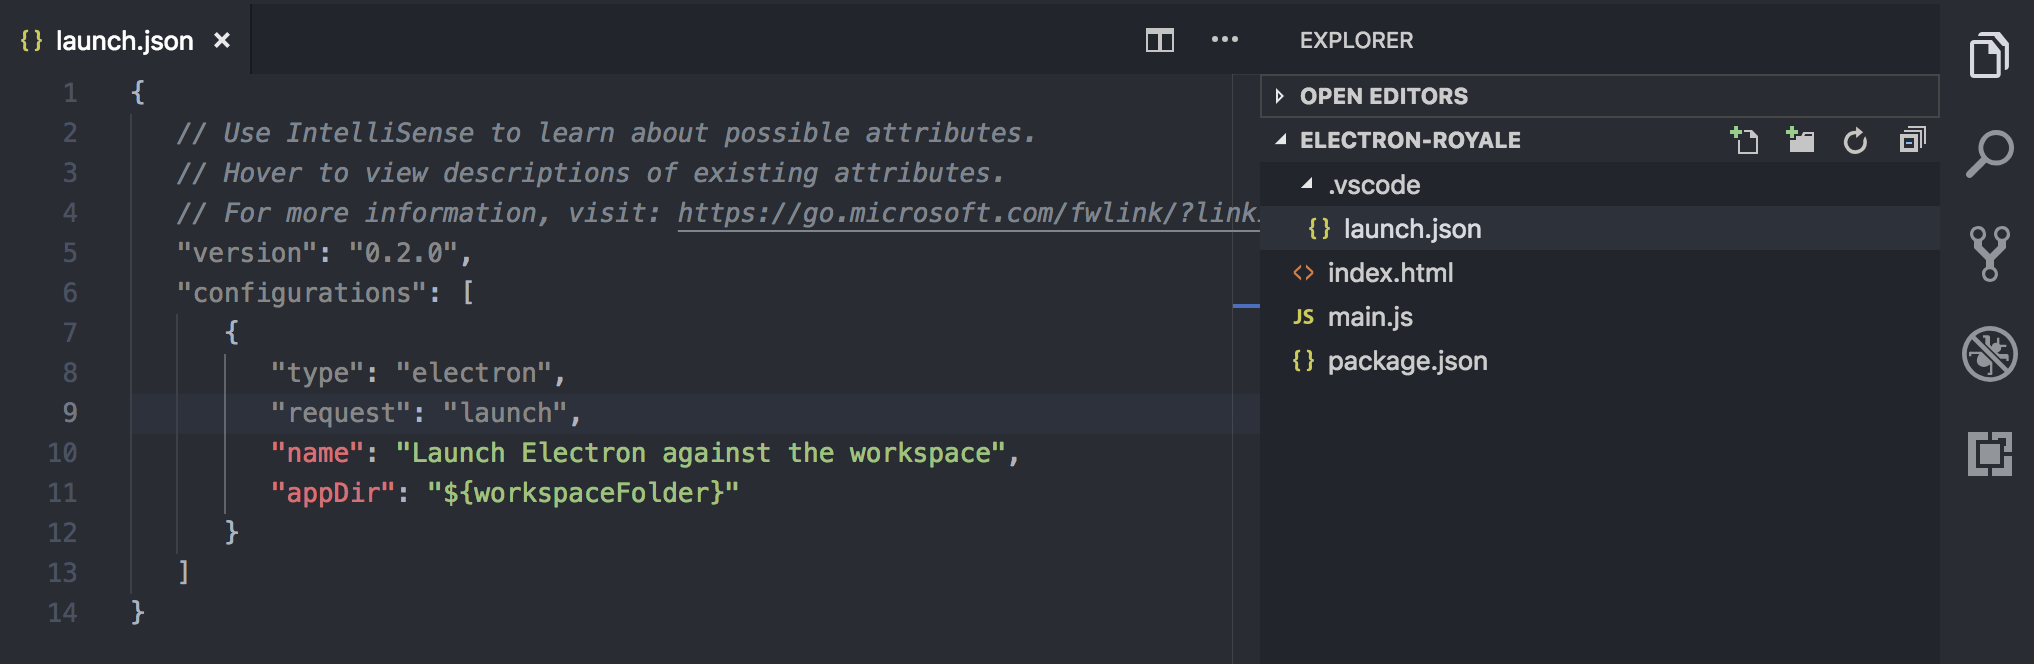
Launch Configuration
You can see the configuration is a simple JSON string like our other configurations.
Let's update the name to Launch Electron and save the document. You can see the name updated in the Debug view:

Launch Electron button
Now, to launch your first Electron app you can use npm start from the Terminal view, or you can click the Launch button in the Debug view. For this guide use the Launch button.
If everything went correctly your first Electron app appears. Congratulations!

Hello World in Electron
Shortly after opening it it will show the Chrome dev tools:

Dev tools
You can use the Dev tools to set breakpoints, inspect the page elements and more.
Let's prevent the dev tools from opening for now. You can re-enable them later.
Open main.js and find and comment out or remove the line below, then save the document:
win.webContents.openDevTools();When you're debugging a session in Visual Studio Code a debug bar appears:

Debug bar appearing
Use that to Pause, Continue, Step Over, Step Into, Step Out of, Reload or Stop your app. You can dock this bar through an option in the VSC preferences… Code > Preferences > Settings > Tool bar location > docked.
Install Electron in the Project
We can set up Electron manually as well, and in this case we install it inside the project folder.
The reason to install it in the project is so we can switch between different versions and maintain control of our dependencies. The downside is that the project has to download an Electron instance and each project instance will take up additional space. If you work on a project on a team it's recommended to keep the instance in your project but not to commit it into version control.
Note: We can have Electron installed inside our project and use the electron install from the Electron plugin or reference another instance externally. Our launch configurations will allow that.
We are going to install Electron in to our root project directory.
Close the app if it is open by going to the menu and choosing Quit your-app.
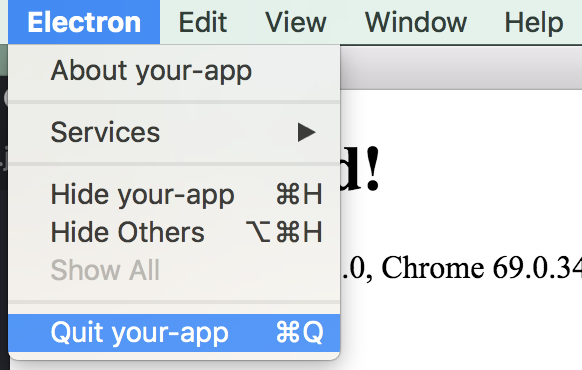
Quit menu
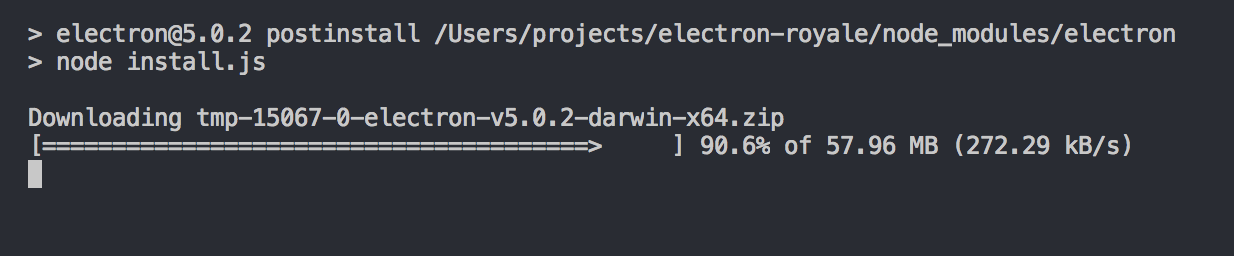
Open the built in Terminal and enter the following npm command:
npm install --save-dev electronElectron will begin downloading the node_modules and its progress will show in the Terminal view:
Downloading…

Download Complete
When the download is complete you see a new folder in your project called node_modules:
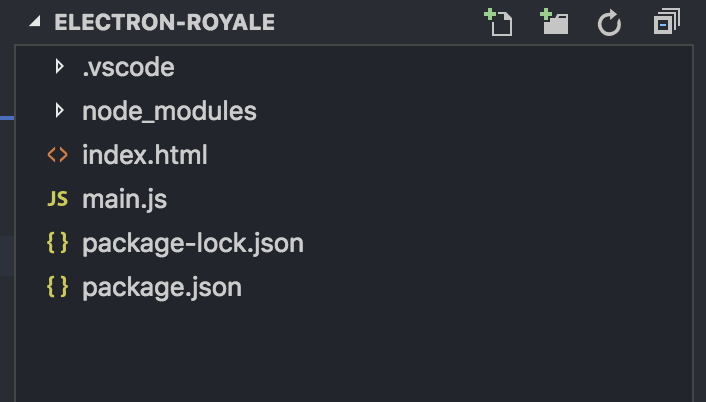
Node installed locally
You will also see that npm install creates a package-lock.json file.
The file package-lock.json is like a quick save for your project. Using it, you or your teammates can restore the dependencies to a specific versioned state. It's described more here, here and here. Commit this configuration instead of the node_modules directory when using version control.
Once the Node modules have been downloaded we may need to manually create the .vscode directory and the launch.json configuration. Create the .vscode directory and launch.json file and enter the value below:
{
   "version": "0.2.0",
   "configurations": [
      {
         "name": "Debug Main Electron Process",
         "type": "node",
         "request": "launch",
         "cwd": "${workspaceRoot}",
         "runtimeExecutable": "${workspaceRoot}/node_modules/.bin/electron",
         "windows": {
            "runtimeExecutable": "${workspaceRoot}/node_modules/.bin/electron.cmd"
         },
         "args" : ["."],
         "outputCapture": "std"
      }
   ]
}
Since the launch.json already exists we can add our new configuration settings to it.
BTW notice in the launch configuration above that the type is node and that runtimeExecutable options are defined.
Let's add our new manual configuration next to our existing extension-created configuration. Open launch.json config and use the values below:
{
   "version": "0.2.0",
   "configurations": [
      {
         "type": "electron",
         "request": "launch",
         "name": "Launch Electron",
         "appDir": "${workspaceFolder}"
      },
      {
         "name": "Debug Main Electron Process",
         "type": "node",
         "request": "launch",
         "cwd": "${workspaceRoot}",
         "runtimeExecutable": "${workspaceRoot}/node_modules/.bin/electron",
         "windows": {
            "runtimeExecutable": "${workspaceRoot}/node_modules/.bin/electron.cmd"
         },
         "args" : ["."],
         "outputCapture": "std"
      }
   ]
}
You'll see why we have added both later.
I recommend you read about the Electron Architecture here and then continue.
You can read more here:
- Electron Quick Start – link
- Electron Quick Start project – link
- Your first Electron project – link
- Electron Architecture – link
Create an Apache Royale project
Now we are going to create our Apache Royale project.
Make sure you have the AS3 & MXML extension installed as mentioned above. This requires Java 1.8. An install page is listed here.
Once the extension is installed you need to point to the Apache Royale SDK in the project. We will do it manually and you can see how to have the extension do it at the link provided earlier.
Open the Explorer view and open the .vscode directory.
In that directory create a settings.json file:
Apache Royale SDK settings.json
Enter the following text:
{
   "as3mxml.sdk.framework": "/Users/user/Documents/Royale_SDK/apache-royale-0.9.4-bin-js/royale-asjs"
}
That will not work as is. You need to enter the path to the directory where you downloaded and installed the Apache Royale SDK.
There is a more in-depth guide here that shows how to set up the SDK with the help of the AS3 & Flex extension. You can use the information to confirm the SDK is available to your project.
Once the SDK is set up you'll need to add an asconfig.json to your project. The asconfig.json file is used to add code intelligence to AS3 and MXML files.
Open the Explorer view, select the root project directory, and create a new file with the New File button. Name it asconfig.json.
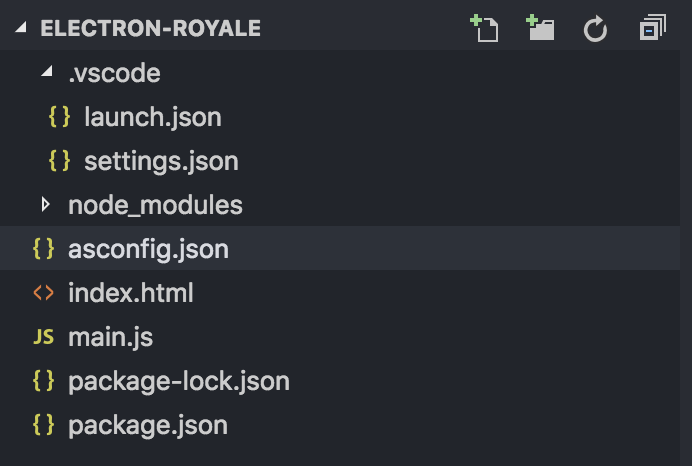
asconfig in project directory
Open the asconfig.json file and enter the following:
{
   "compilerOptions": {
      "source-map": true,
      "html-template": "index.html",
      "theme": "${royalelib}/themes/JewelTheme/src/main/resources/defaults.css"
   },
   "additionalOptions": "-warn-public-vars=false",
   "files":
   [
      "src/HelloWorld.mxml"
   ]
}
Notice the page we are pointing to in the html-template option. This is the Electron index.html page. We will use this as the Royale app template page.
Note: We can use any page as a template but we need to update the page with special tokens that the Apache Royale compiler looks for.
Note: In the theme option we have a token for royalelib. If you have any issues with this, if the components do not look like they have any theme, then you may have to use the full path to your Royale install.
For example, you may have to use something like:
"C:/ApacheFlexInstall/apache-royale-0.9.6-bin-js-swf/royale-asjs/frameworks/themes/JewelTheme/src/main/resources/defaults.css"Note: We can add another configuration option called config that will provide us with code intelligence for the node APIs (see first line).
{
   "config": "node",
   "compilerOptions": {
      "source-map": true,
      "html-template": "index.html",
      "theme": "${royalelib}/themes/JewelTheme/src/main/resources/defaults.css"
   },
   "additionalOptions": "-warn-public-vars=false",
   "files":
   [
      "src/HelloWorld.mxml"
   ]
}
This shows us classes and code completion for some Node APIs (possibly only for the Main process). The issue when we use this option is we get an error on the first line of our MXML document:
This tag could not be resolved to an ActionScript class. It will be ignored. js:Application
You can have this option enabled and choose to Debug anyway and it will run. For now, remove this option and add it in later if appropriate as needed.
Let's continue and update our HTML page to our HTML template.
Open the index.html page in the root of the project directory and enter the following HTML:
<!DOCTYPE html>
<html>
<head>
    <meta http-equiv="Content-Type" content="text/html; charset=utf-8">
    <meta name="Custom Template for injecting custom style CSS">
    <meta name="viewport" content="width=device-width, initial-scale=1.0, maximum-scale=1.0, user-scalable=no" />
    <link rel="stylesheet" type="text/css" href="${application}.css">
    <link href="//fonts.googleapis.com/css?family=Lato:400,700" rel="stylesheet">
${head}
</head>
<body>
${body}
</body>
</html>
Notice we have the ${head} and ${body} tokens.
Now we need to create a new directory for our application.
In the root of the project create a directory named src and create an MXML document in that directory named HelloWorld.mxml.
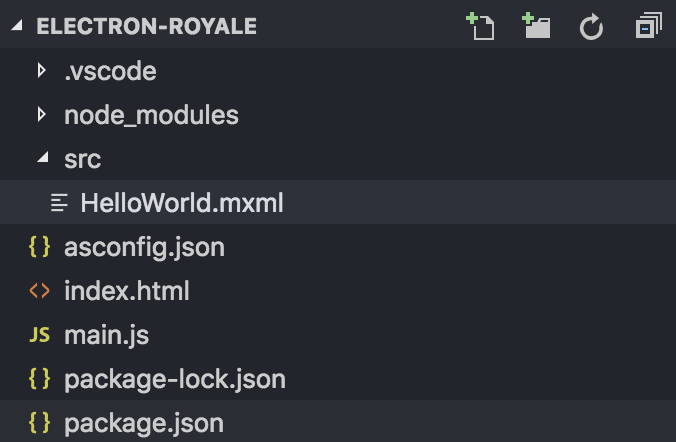
HelloWorld.mxml
In HelloWorld.mxml enter the following value:
<?xml version="1.0" encoding="utf-8"?>
<js:Application xmlns:fx="http://ns.adobe.com/mxml/2009"
   xmlns:js="library://ns.apache.org/royale/express"
   xmlns:html="library://ns.apache.org/royale/html"
   xmlns:j="library://ns.apache.org/royale/jewel">
   <js:initialView>
      <js:View>
         <js:Label id="helloLabel" text="Hello World" x="240" y="20"/>
         <j:Button id="helloButton" text="Hello" x="20" y="20"/>
      </js:View>
   </js:initialView>
</js:Application>
Create the Compile Task
To compile our Royale application we need to create a compile task. We can use the AS3 & MXML extension to create a compile task or we can do it manually.
Let's create a compile task manually and then maybe later create it with the extension.
In the .vscode directory create a tasks.json:
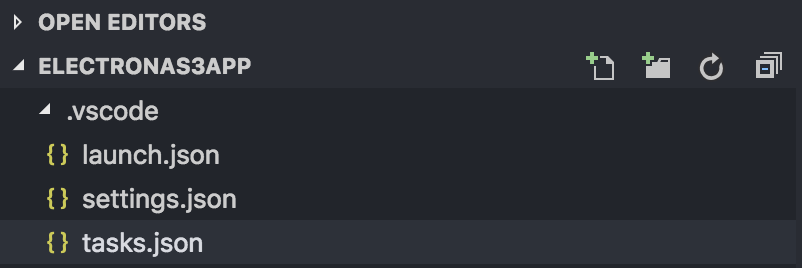
Tasks
In tasks.json add the following value:
{
   "version": "2.0.0",
   "tasks": [
      {
         "label": "Compile",
         "type": "actionscript",
         "debug": true,
         "group": {
            "kind": "build",
            "isDefault": true
         }
      }
   ]
}
For documentation about the tasks.json format go here.
Notice the label property. It is named Compile. We can name it anything, but for now name it Compile. We'll refer to this task later by name as a preLaunchTask.
Before we can launch our Apache Royale app we need to build it. Building it compiles the MXML and ActionScript into HTML and JS.
We can build it from the Run Build Task in the Visual Studio Code menu.
In the menu go to Terminal and choose Run Build Task.
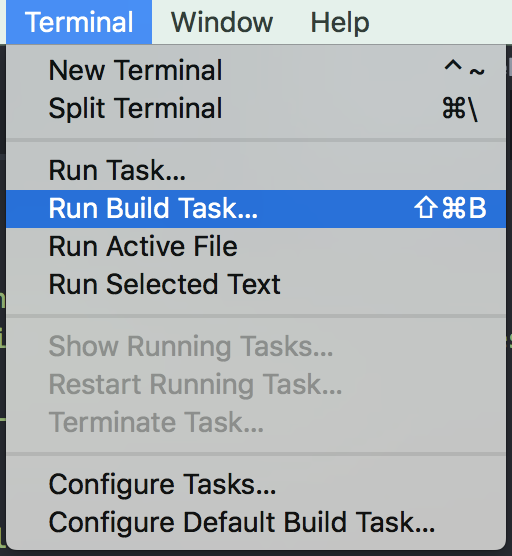
Run Build Task
You can also use Command + Shift + B or CTRL + Shift + B.
That will open Terminal and show you messages from the Apache Royale compiler. Check these messages for any errors and information about the project.
When that is complete you'll see a "compile successful" message:
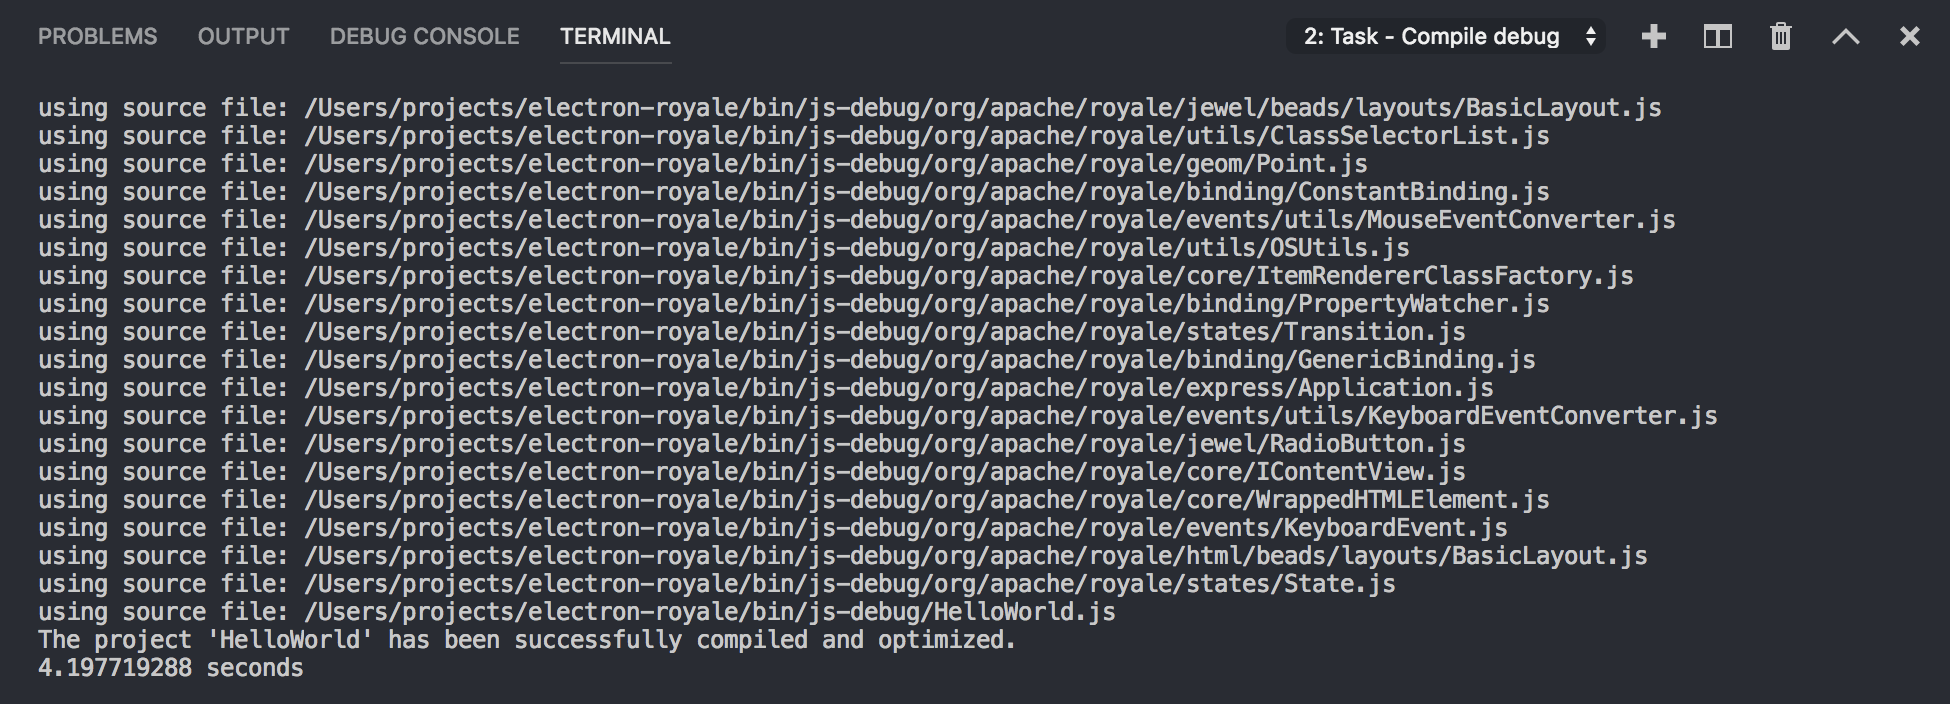
Compile Successful
Congratulations! You will also see a new directory in your project named /bin:
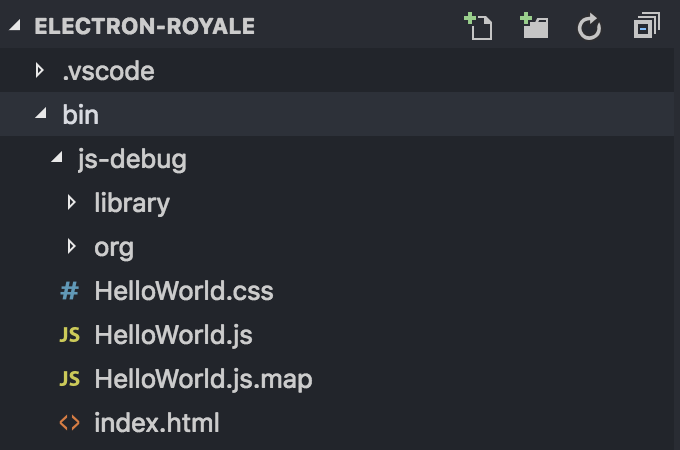
Exported to bin directory
We could open this index page in a browser using the Firefox debugger, but for our Electron app we are not done yet.
If we launched our Electron app now, not the Royale app, it would open the template page because it is still pointing to the index page in the root of our project.
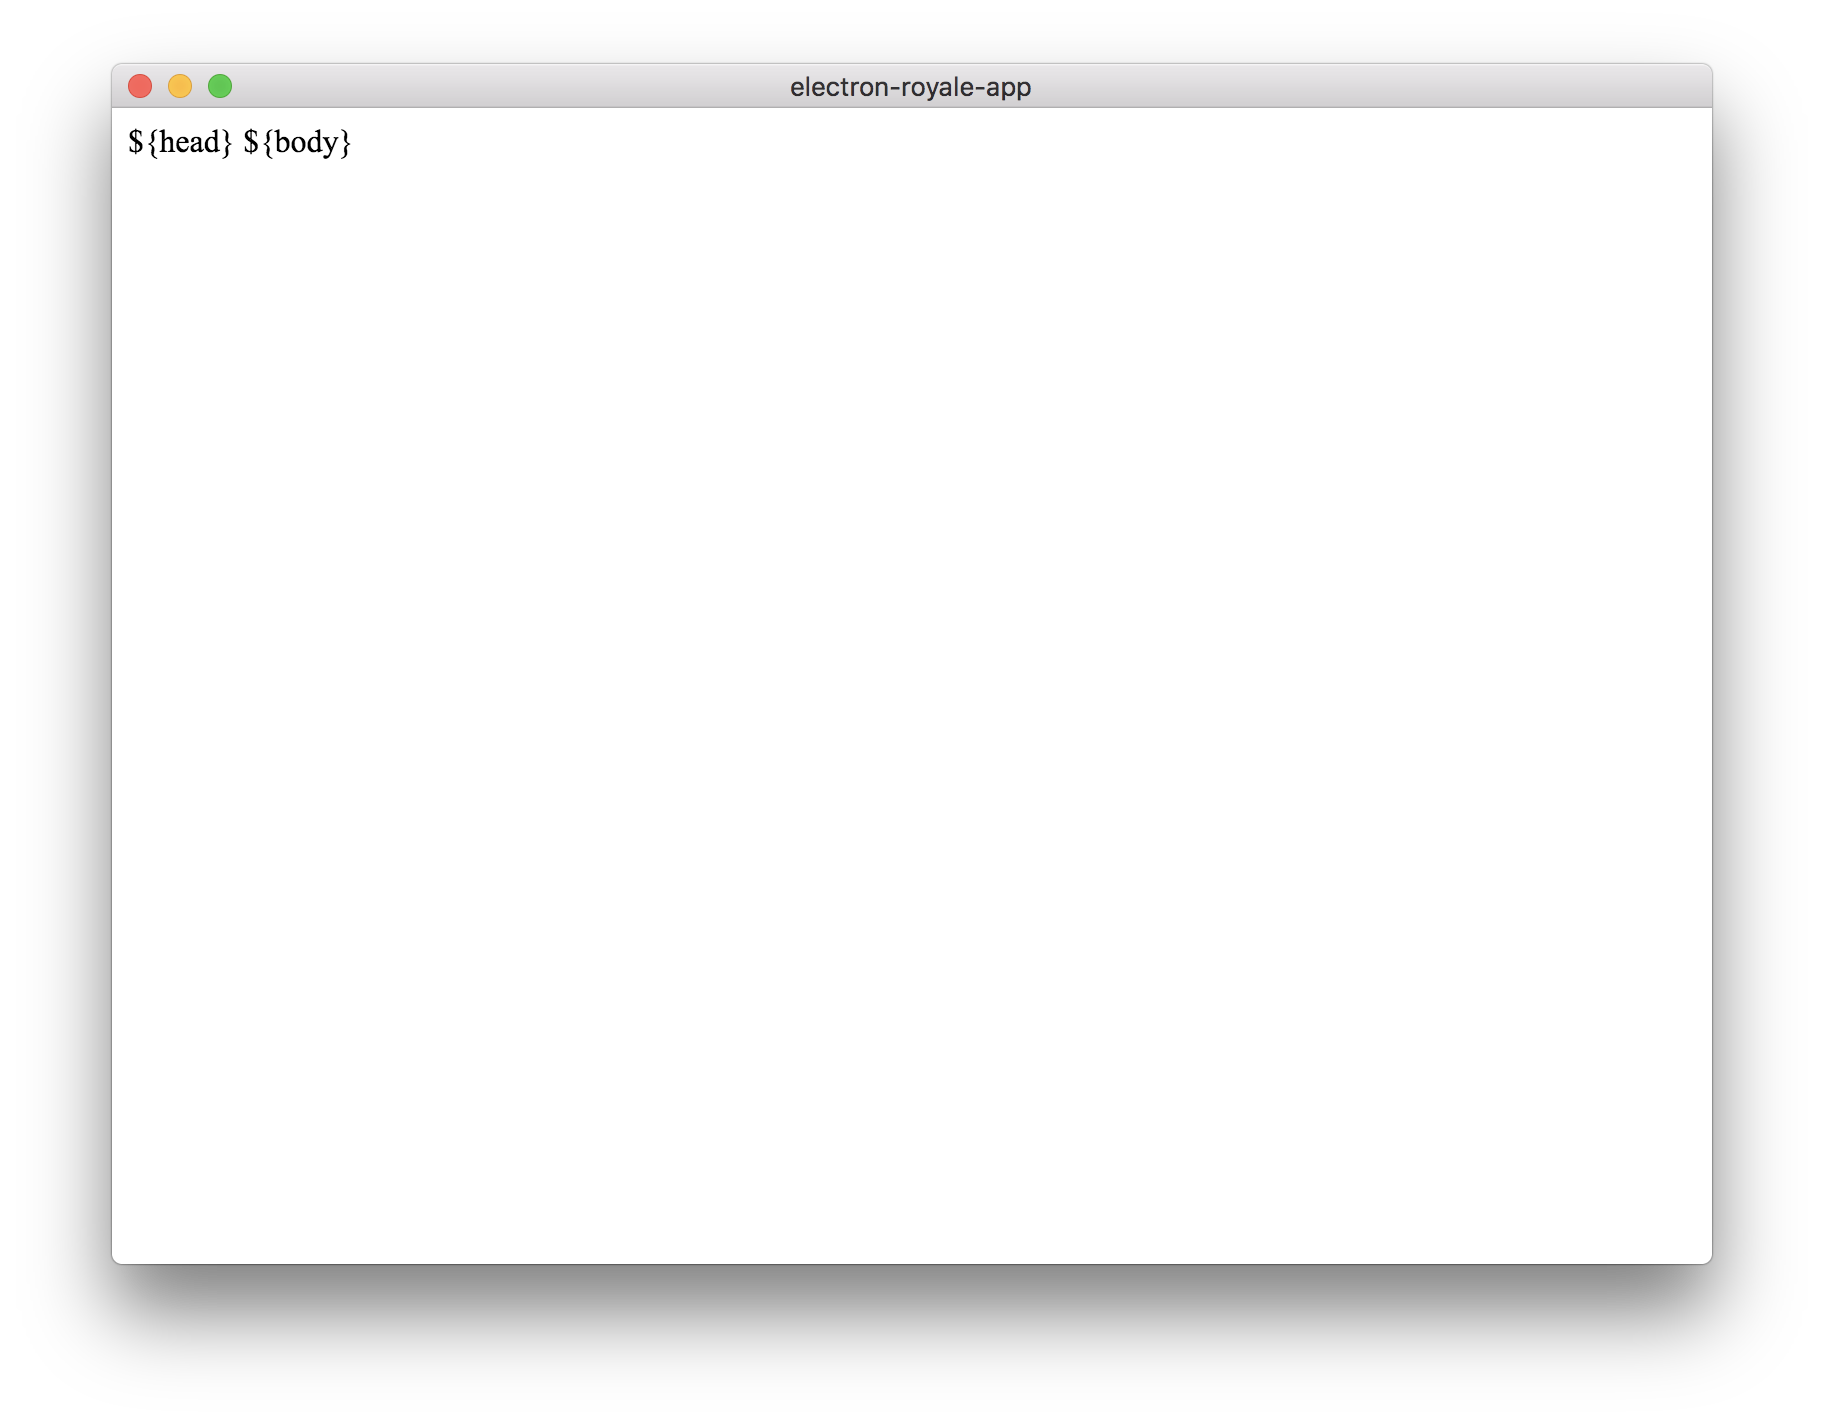
Pointing to the template
The actual Royale application is in bin/js-debug/index.html that is created after we compile HelloWorld.mxml. So we need our Electron app to load in the application page and not the template.
Open main.js and find the line that loads in index.html:
// load the index.html of the app.
win.loadFile('index.html')
Change it to point to our exported Royale application:
// load the Apache Royale index.html
win.loadFile('bin/js-debug/index.html')
Note: We can easily load in different pages in Electron using the loadFile() method. You can use inter-process communication to have an action on your web page load another web page. You'll learn more about this later.
If you've compiled the Royale project successfully and changed the path to load the index.html page in the bin directory, we are ready to start our Electron project.
Open the Debug view and start Launch Electron. Since everything always goes well on the first try you should have a running application:

Royale Hello World
Note: If you the button is missing its theme, check the theme value in the asconfig.json and troubleshoot as mentioned above.
Note: If we make changes to our application and then run the Launch Electron task again we may not see our changes.
In Flash Builder there was an option to Build Automatically that was enabled by default. What this means is your projects were built automatically when you saved the document. Building the application also provided warnings and error messages in the problems view. We can do something similar with a prelaunch task.
Let's add a prelaunch task to build our application before we launch it.
Remember how we named our compile task earlier? We are are going to tell our Electron launch configuration to run the Royale compile task before starting the application.
Open launch.json and add a prelaunch task property and set it to our Compile build task (mentioned in the tasks.json file). The launch.json should look like the following:
{
   "version": "0.2.0",
   "configurations": [
      {
         "name": "Launch Electron",
         "type": "electron",
         "request": "launch",
         "preLaunchTask": "Compile",
         "appDir": "${workspaceFolder}"
      },
      {
         "name": "Debug Main Electron Process",
         "type": "node",
         "request": "launch",
         "cwd": "${workspaceRoot}",
         "preLaunchTask": "Compile",
         "runtimeExecutable": "${workspaceRoot}/node_modules/.bin/electron",
         "windows": {
            "runtimeExecutable": "${workspaceRoot}/node_modules/.bin/electron.cmd"
         },
         "args" : ["."],
         "outputCapture": "std"
      }
   ]
}
Make sure the name is the same. It is case sensitive. We can, of course, add more launch configurations with or without these options at any time.
FYI You can learn about the possible launch attributes and their values by hovering your mouse pointer over them or by going here.
Now launch the application again using either of the two launch configurations.
You'll see that the Royale application is built right before the Electron application is launched. If there are any errors in your Royale app the Electron app will not launch.
Communicating with the Main Process
Electron apps have two primary processes. The Main process and the Renderer process. The Royale application runs in the Renderer process and the Electron application runs in the Main process.
Although the processes are separate you can communicate between them using a variety of methods. Read more about this here and then continue.
For this guide we'll send messages.
Open your "Hello World" mxml application and add a script block below the js Application tag and above the initialView tag:
<fx:Script>
    <![CDATA[

    public function clickHandler(event:Event):void {
        var electron:Object;
        var ipcRenderer:Object;

        // check for electron
        // if we add tag config:"node" to our asconfig we get node code intelligence but error for js:Appliction
        if (window["require"]) {
          electron = window["require"]("electron");
          ipcRenderer = electron.ipcRenderer;
          ipcRenderer.send("mainMessageHandler", "hello");
          ipcRenderer.on("rendererMessageHandler", rendererMessageHandler)
        }
        else {
          helloLabel.text = "Electron is not found";
        }
    }

    public function rendererMessageHandler(event:Object, data:String):void {
        trace("Data received:", data);
        helloLabel.text = data;
    }

    ]]>
</fx:Script>
In the button add a click handler:
<j:Button id="helloButton" text="Hello" x="20" y="20" click="clickHandler(event)"/>When we are running in an Electron app the Renderer process, or the browser window, makes additional objects available. The main ones are electron and ipcRenderer. We will use these for communication.
Sending a message is somewhat like dispatching an event. We can send synchronous and asynchronous messages.
The following example code will dispatch a "sayHello" message with a "hello" value:
// example code
const electron = window["require"]("electron");
const ipcRenderer = electron.ipcRenderer;

ipcRenderer.send("sayHello", "hello");
We are sending a String but we could send an Object. Read more here before continuing.
In our main.js we will add a listener to handle this event. At the end of the main.js document add the following:
const { ipcMain } = require('electron')
ipcMain.on("mainMessageHandler", (event, arg) => {
  console.log(arg);
  var time = new Date().toLocaleTimeString();
  win.webContents.send("rendererMessageHandler", "hello there. it's " + time);
})
Notice the rendererMessageHandler. We have added a listener for this event in HelloWorld.mxml.
Launch the application and click the Hello World button.

Hello World message
Debugging
To debug the Renderer process, HelloWorld.mxml, add a breakpoint in the button click handler. Open the debug view and click Launch Electron. When you click the Hello button, the debugger opens at that point showing you local variables and classes. Take a minute and review the objects available to your application:
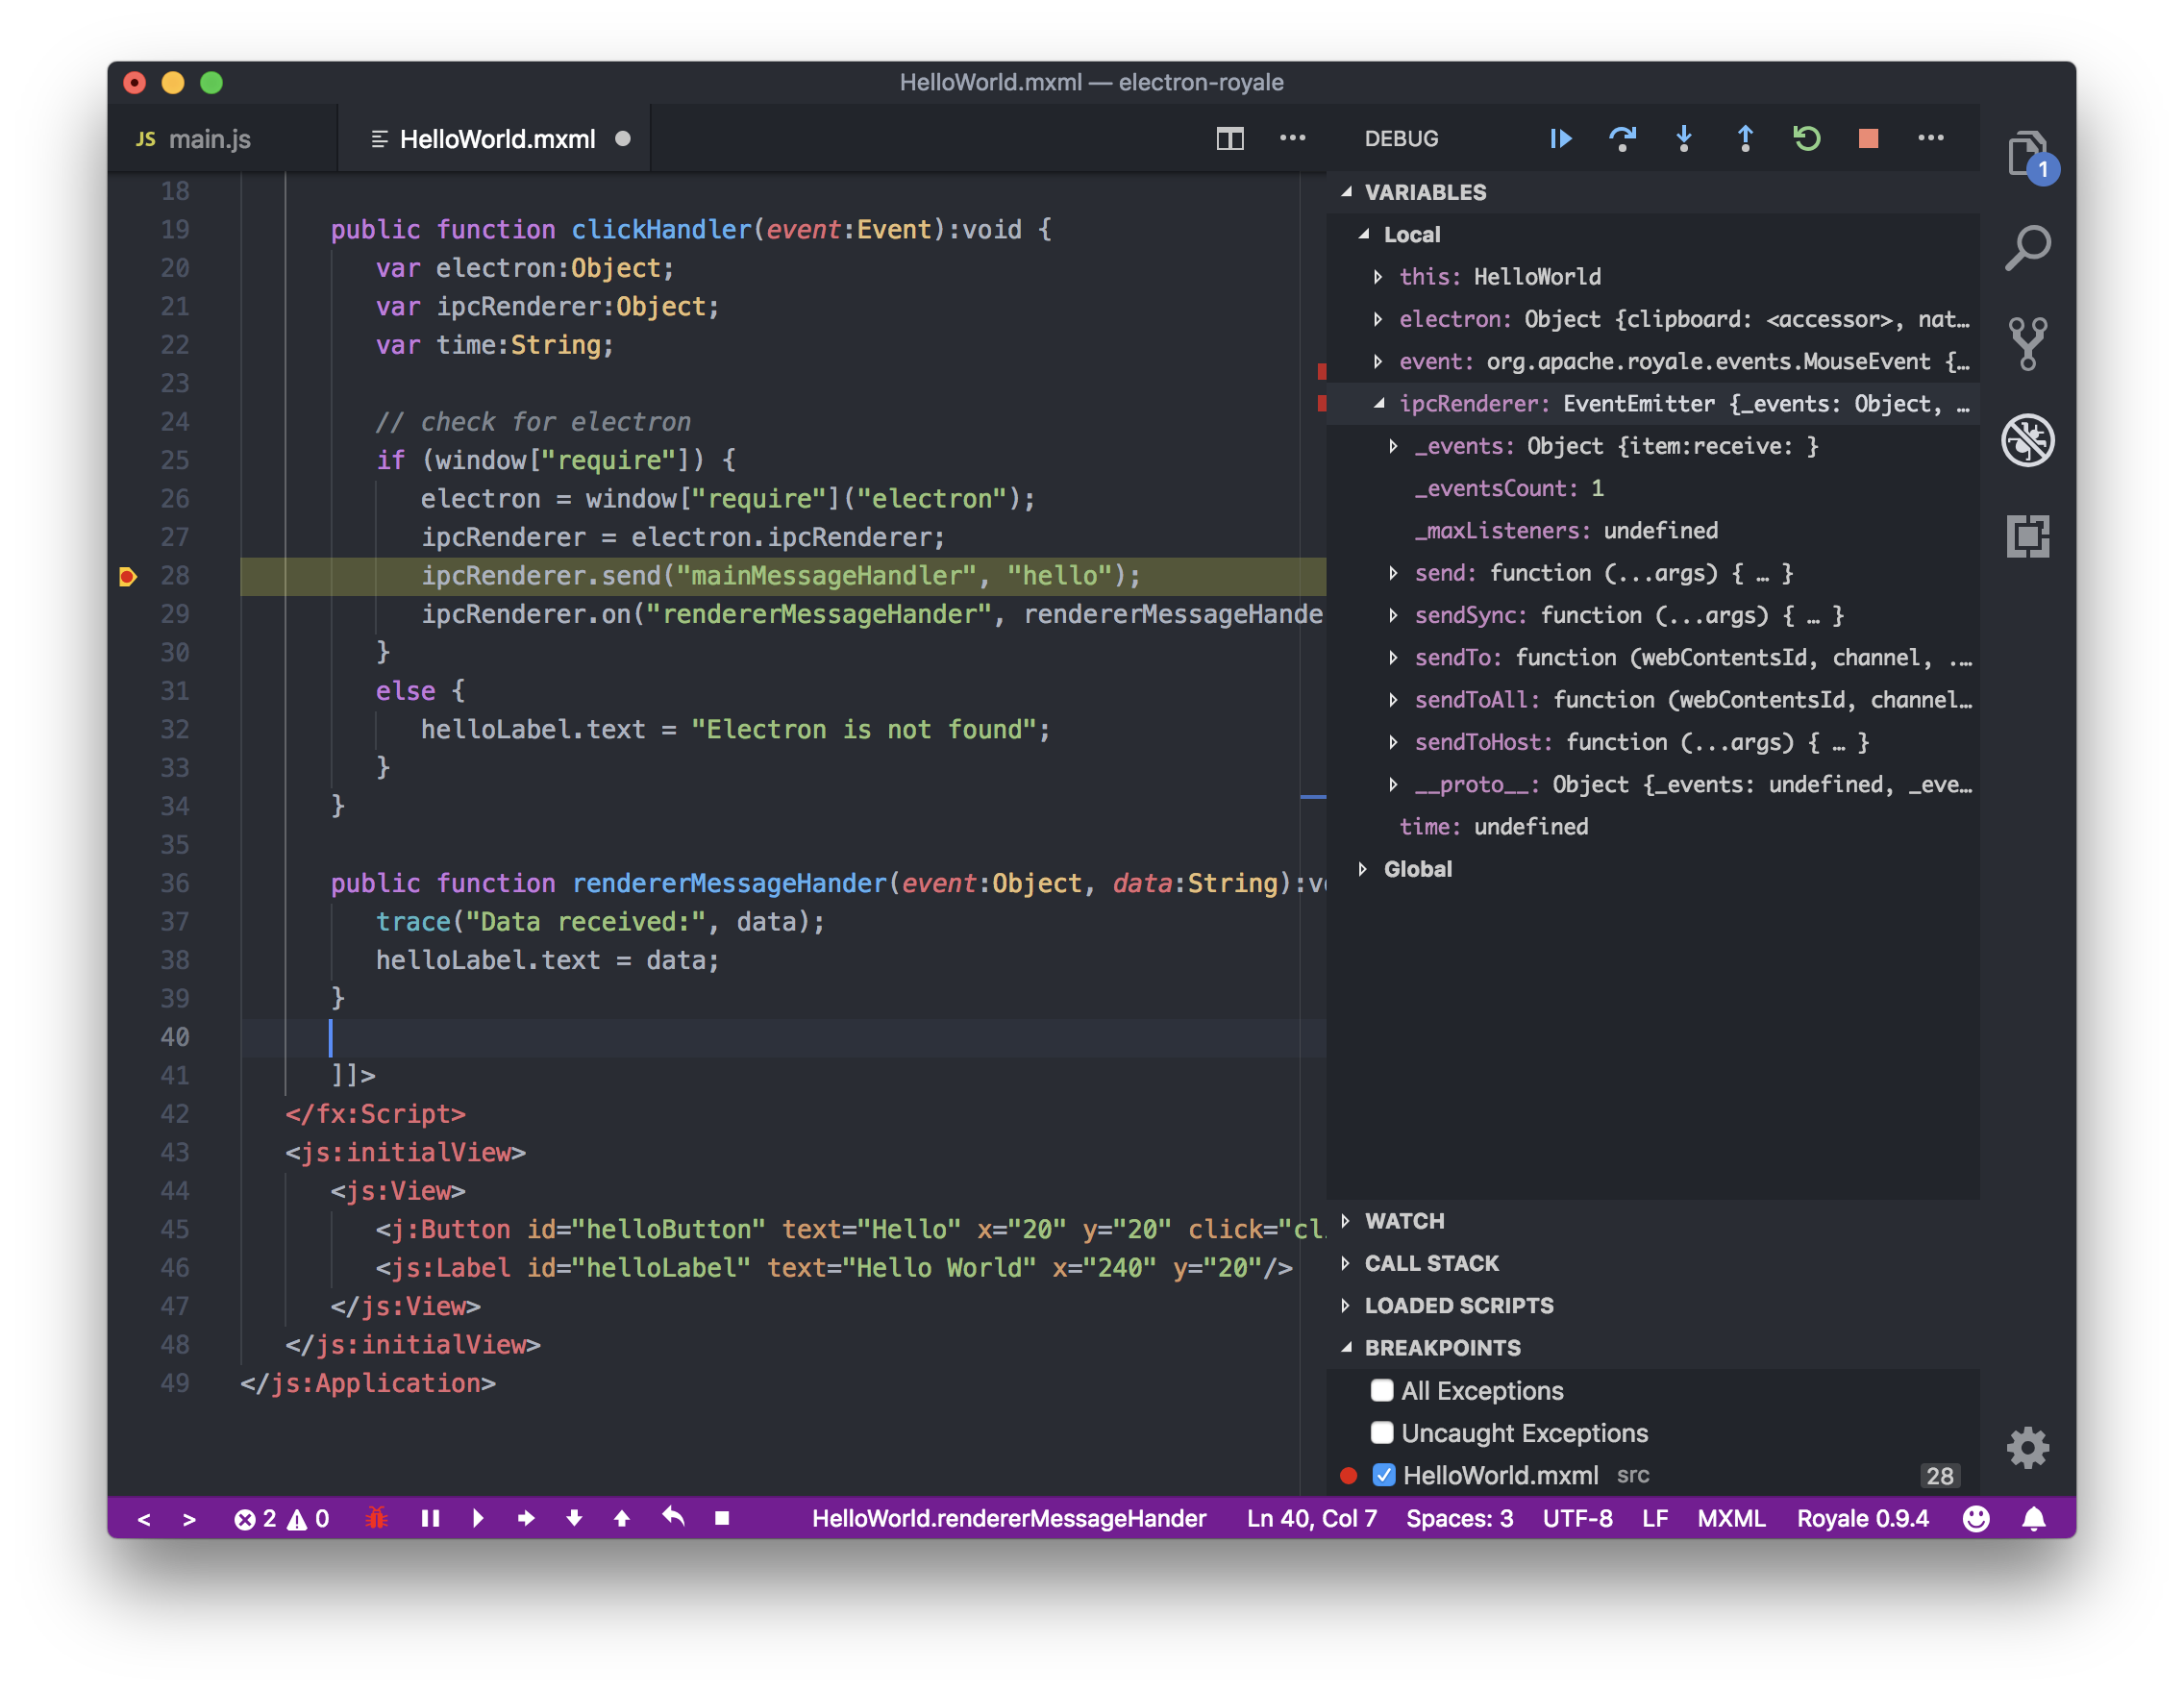
Debug Hello World
To debug the Main process, main.js, add a breakpoint in the mainMessageHandler. Open the debug view and click Debug main Electron process.
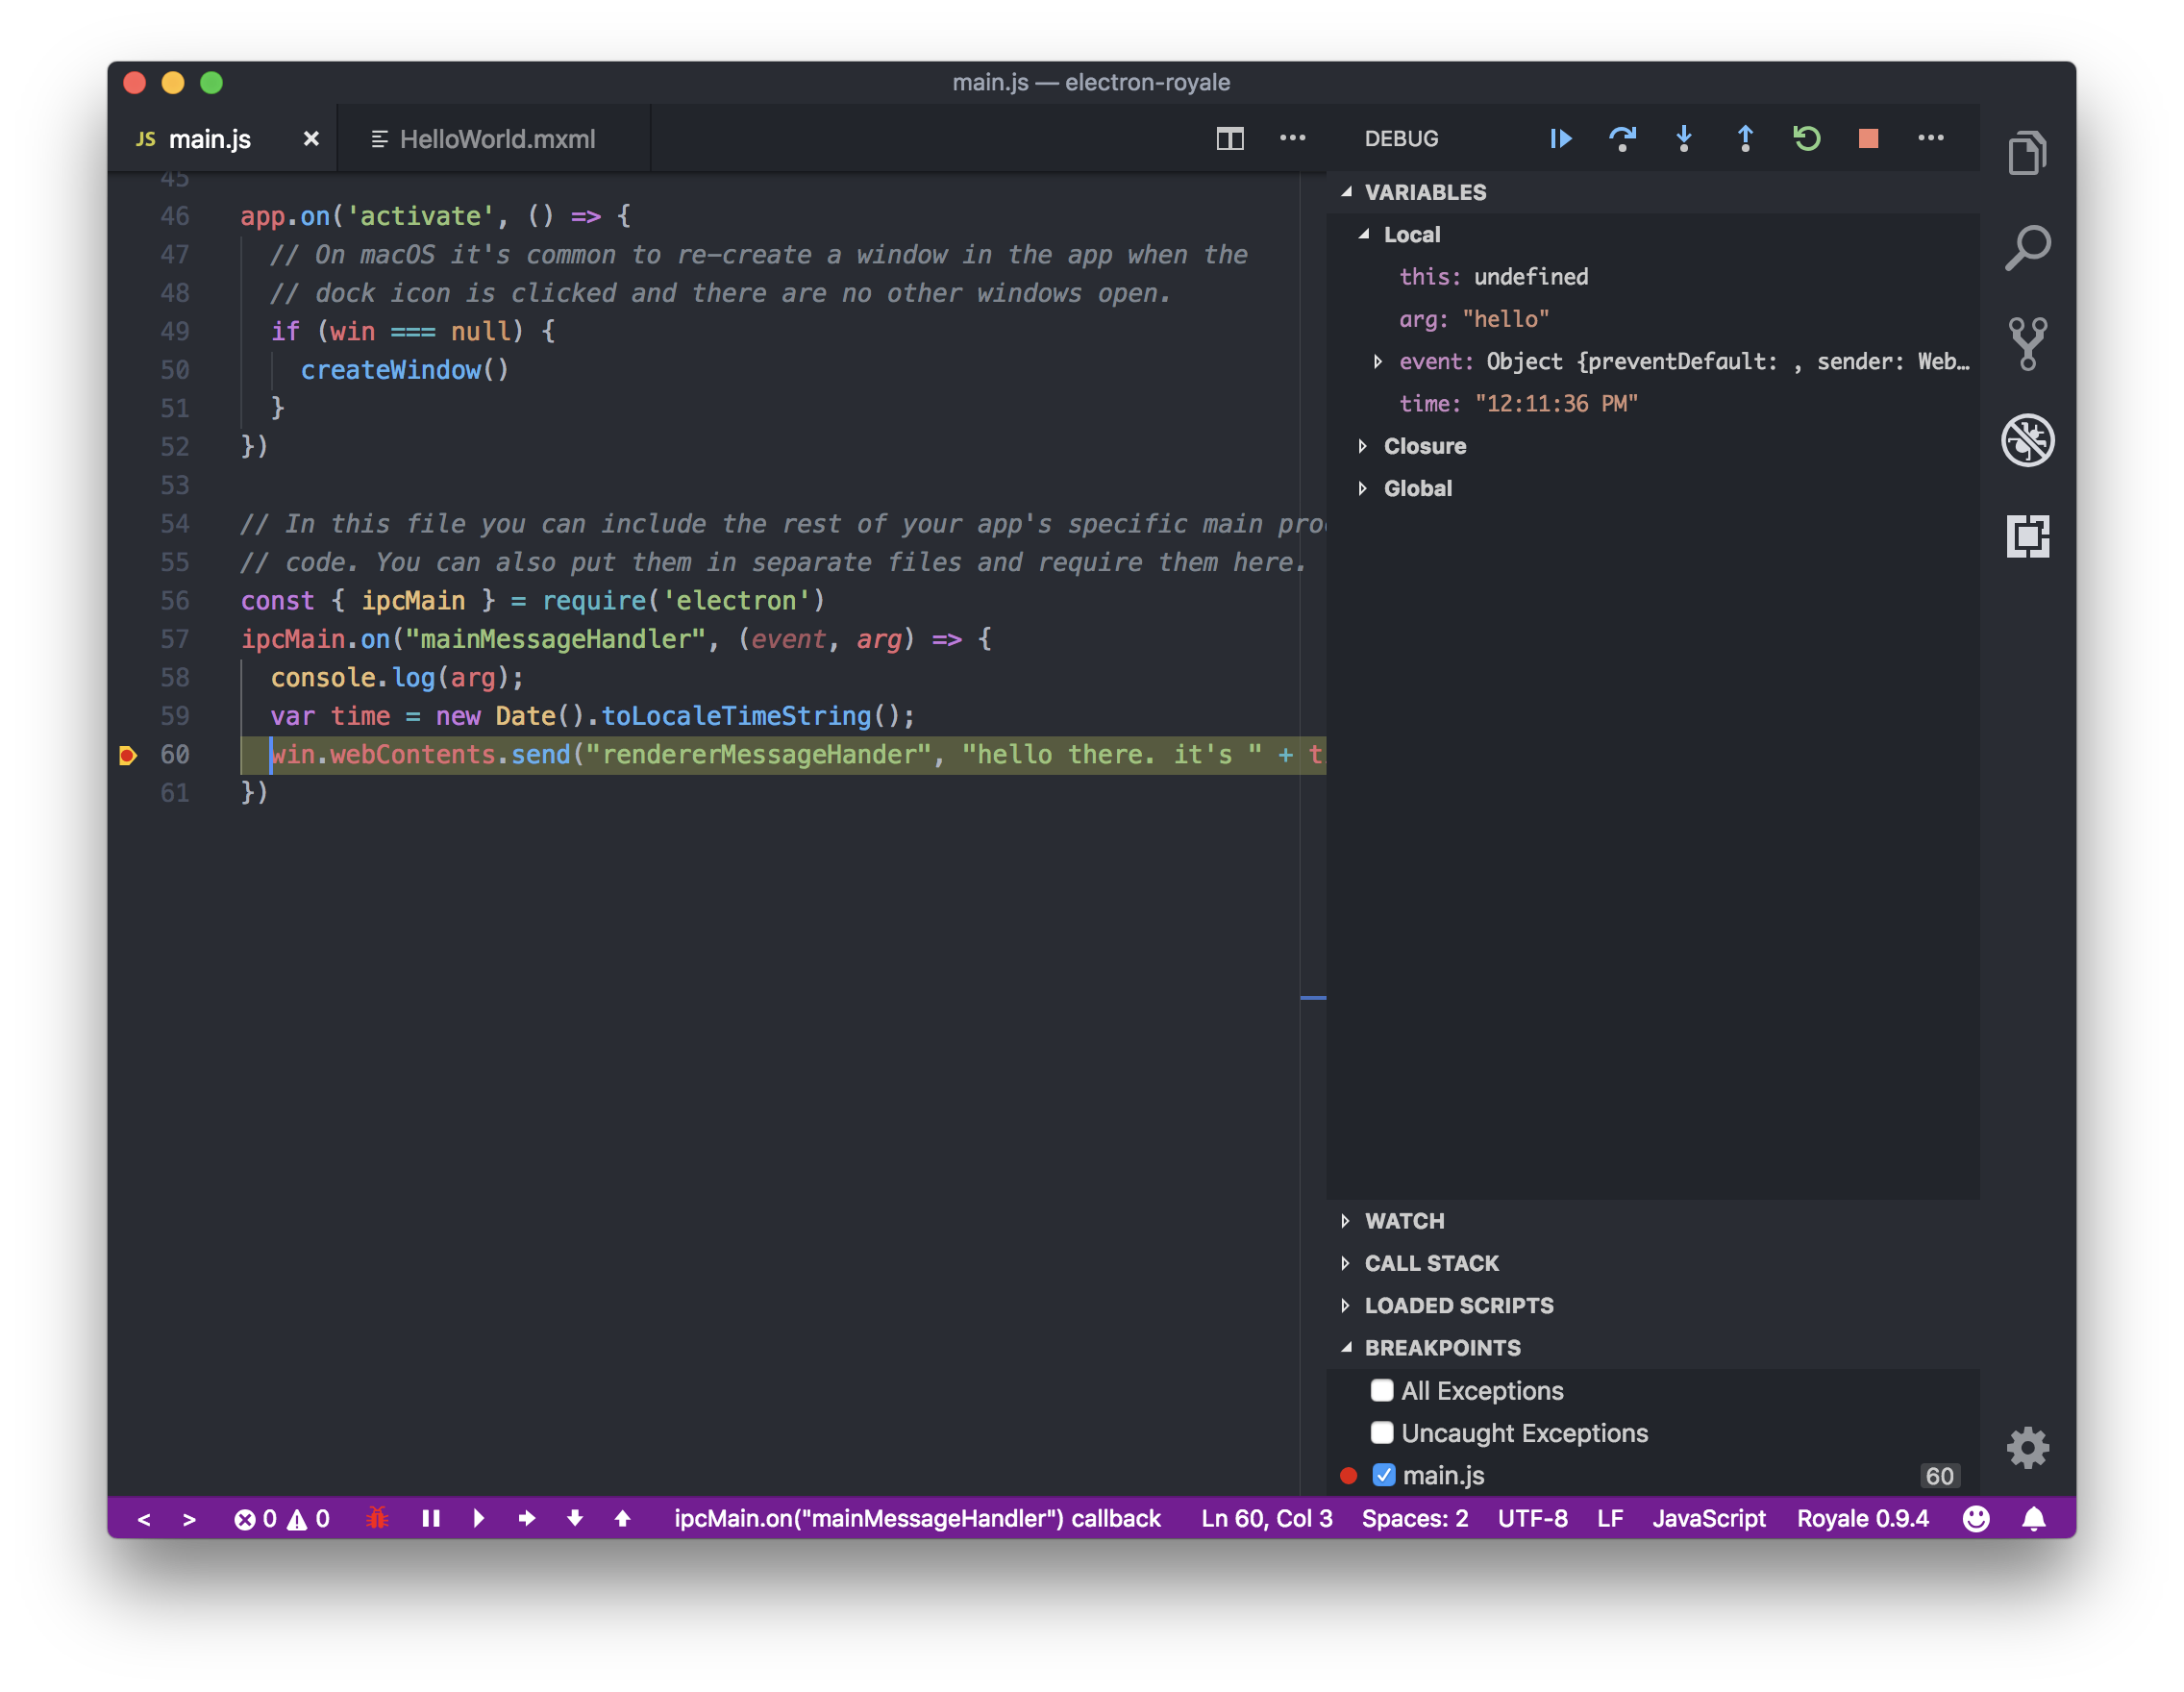
Debug Main
We use the first one to debug the Renderer process and the second to debug the Main process. You can also use the integrated Chrome dev tools mentioned earlier.
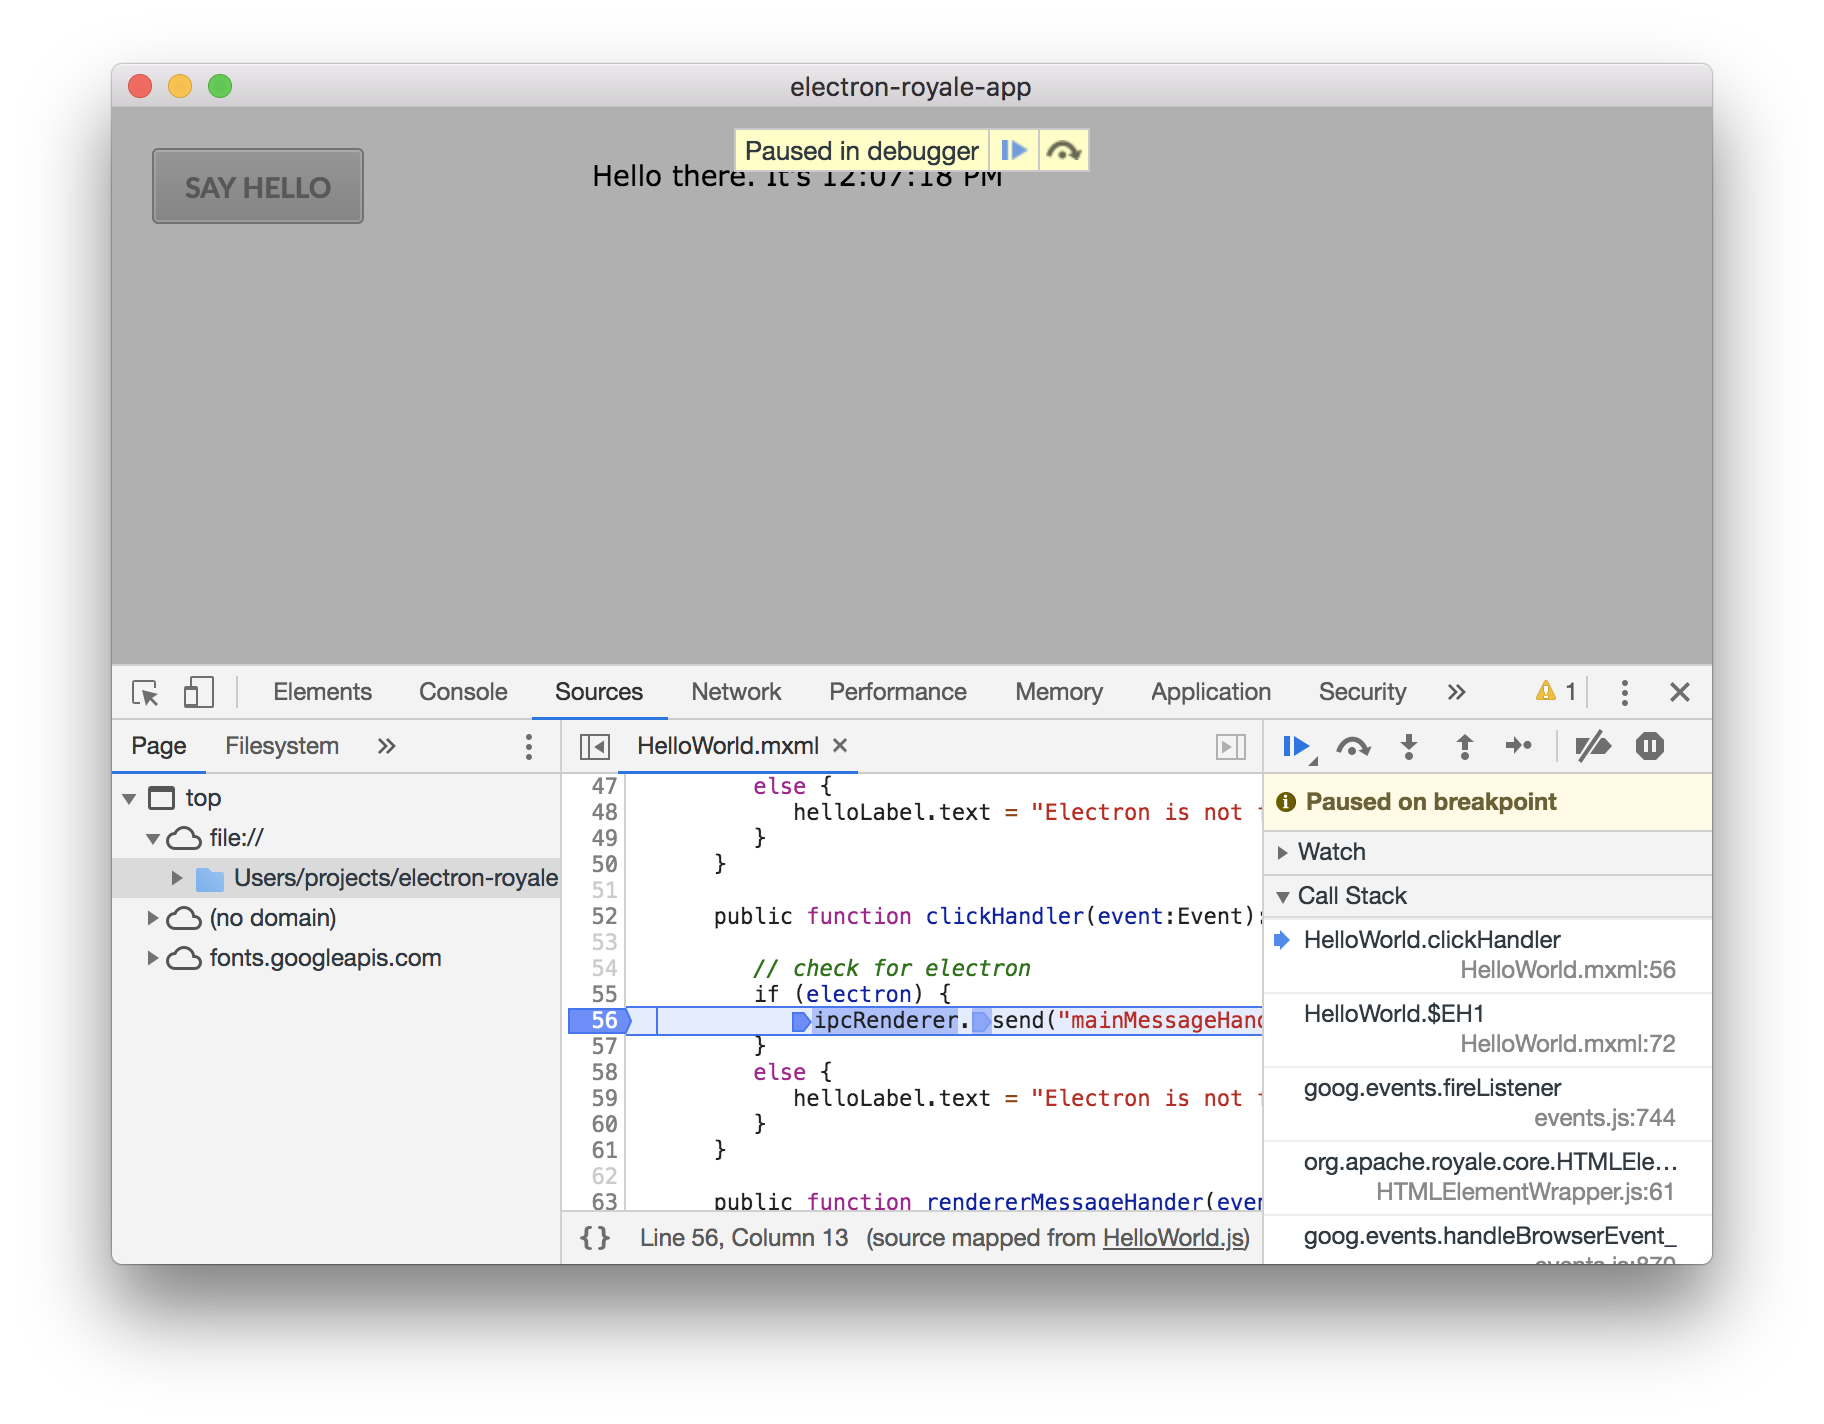
Chrome dev tools
Open launch.json. In the first launch configuration notice the type says electron. In the second launch configuration notice the type is node.
Note: This author has not found a way to hit both breakpoints for the Royale application and the Electron app in one session in Visual Studio Code. However, using a combination of the integrated Chrome dev tools (shown above) to set breakpoints you can use the second configuration, Debug main Electron process, to break on both the Royale and Electron processes, but the break occurs in the Chrome Dev tools and not Visual Studio Code. You could also debug the Royale instance only using the Firefox debugger and launching in a browser.
Summary
In this guide you've created a desktop application using Royale and Electron. You've sent a message to the Main process and sent that message back to the Renderer process. You've set a break point in the debugger.
The example project is attached here: Apache Royale Electron zip
If you use the Moonshine IDE, an example project is available here.
Next Steps
- The Wiki has more information on the AS3 & MXML plugin here
- Electron documentation here and here
- Sample Electron apps here
- ipcMain and ipcRenderer
- Apache Royale Getting Started here
- Install the Firefox Debugger and debug Royale in the browser
- Electron Hello World Walkthrough on YouTube here
- Learn the Apache Royale components and layouts with Tour of Jewel here
- Join the Apache Royale Mailing Lists
Contributions
Thanks to the work of numerous individuals and projects in the Apache Royale community.