Apache Royale v0.9.7 released!
The Apache Royale community is pleased to announce the release of Apache Royale 0.9.7.
The Apache Royale project is the next generation of the Apache Flex SDK. It lets developers use MXML and ActionScript 3 to generate HTML/JS/CSS applications which can run natively in browsers. The cross-compiled code can also run on platforms like Electron or Apache Cordova (Adobe PhoneGap) to build mobile applications.
This release should be considered 'beta' quality, although we're very close to a 1.0 release and we have many applications in production at this point. The purpose of this release is to continue to gather feedback about Royale's features and the project's implementation strategies, and to recruit new contributors. We hope to grow the code base into an SDK and tool chain that delivers the highest productivity when developing applications that can run on many platforms. Beta releases, however, may not handle all production needs.
Changes in 0.9.7:
Apache Royale Framework 0.9.7
- Reflection support improved (supports access to custom namespaces) including improved utility methods
- Added a
getTimeremulation to Core library, similar toflash.utils.getTimer - added
[RoyaleArrayLike]implementation support to Royale Collections, and BinaryData - improvements to XML/E4X conformance, and memory footprint
- General improvements in Bindings, including function bindings
- Added new Router classes
- Added AMFLocalStorage, a javascript version of the Flash runtime LSO (Local Shared Object)
- Added new ItemRendererInitializer bead infrastructure to decouple better item renderers functionality
- Added ToolTipRemovalWhenItemRemoved for renderers that use tooltips.
- Fix bin/mxmlc and bin/compc scripts that did not understand certain default compiler options in royale-config.xml
- Crux:
- Improved:
- Crux can now be used in MXRoyale and SparkRoyale applications
- New:
- Added support for using Command pattern to Crux
- Added Documentation in royale-docs site
- Improved:
- Graphics:
- New:
- Added new high-parity swf graphics emulation (UIGraphicBase)
- New:
- Jewel:
- Improved:
- Massive refactors and improvments
- Hierachy improved in many Jewel framework branches to make StyleUIBase the base of all components and unify APIs.
- StyleUIBase now improve width and height so we can use NaN values to unset values. For JS this means return to default values.
- Card: Added new subcomponents (CardHeader, CardTitle, CardPrimaryContent and CardActions)
- Button: Added new unboxed and outlined styles (also to IconButton and ToggleButton)
- CheckBox and RadioButton now can size the icon part
- ComboBox can now confifure custom renders and supports rowCount, and fixed percent width. also popup adapts to data provider length.
- List supports now variableRowHeight, scrollToIndex and can be navigated with arrow cursors (up/down)
- Item Renderer: Use the new Initializer infrastructure
- Remove mappers to rely on basic ones, also remove CRUD beads (Add, Remove and Update item beads)
- Layouts, Group and Container supports variableRowHeight
- Layouts many fixes and improvements in alignment, and now dispatch childs dispatch a "sizeChanged"
- Viewport and ScrollingViewport refactor. Viewport has now clipContent so Container can activate/deactivate
- added tabindex in many components and to Disabled bead (=-1)
- Prompt beads now support changes at runtime
- TabBar: fix AssignTabContent bead when change dataprovider
- Jewel Themes was updated to show many visual improvements in colors and styles. Flat and Light themes are almost finished. Still Dark themes are work in progress.
- Tour De Jewel was updated to show all the latest updates
- New:
- Runtime Theme Switch. Can be seen working in Tour De Jewel
- StyledUIBase now adds min and max width and height properties.
- Added VSlider. The original Slider is now HSlider.
- Added Paddings bead
- Added VContainer and HContainer for clipped content
- Added DataGrid
- Added ButtonBar
- Added ComboBoxTrucatedText
- Added DrawerFooter
- Added VirtualList and VirtualComboBox to load huge amounts of data in a performant way
- New colors for text and icons (lightest, light, normal, dark and darkest)
- Added Jewel TodoMVC and TodoMVC with Crux examples following the TodoMVC website guidelines. Also added more blog examples.
- Improved:
- Icons
- Refactored classes IIcon classes to support more icons sets
- Added FontAwesome v5 support (also v4)
- Icons now support Material and FontAwesome (more sets can be added)
- SVG:
- Fixed SVGImage when using Maven
- Network:
- Improved:
- URLLoader now respects contentType passed in via URLRequest.
- New:
- Added URLVariables emulation
- Improved:
- MXRoyale:
- Improved:
- mx.utils.ObjectUtil – improved parity
- mx.net.SharedObject – improved parity
- add support for legacy HttpService decoding format
- Fixes in mx.messaging for polling support, mx.external.ExternalInterface
- New:
- mx.net.SharedObjectJSON – new alternative
- Improved:
- Maven:
- Massive improvements
- Now Maven can generate a valid distribution (SDK) to use in any IDE (tested on VSCode and Moonshine) distribution can be JS only
- SASS generation is now separated from main build to a profile to save lots of time when no need to build themes
- RoyaleUnit:
[Test(async)]may be used to define asynchronous tests[BeforeClass]and[AfterClass]metadata must be added to static methods[Test]metadata supports an 'expected' attribute to expect a thrown exception- Fixed incorrect order of expected and actual values in assert messages
- RoyaleUnitUI: An optional UI to display the results of RoyaleUnit tests
- Dozens of bugs reported, investigated, and squashed. For details of closed bug reports see GitHub Issues list.
Updates to the RELEASE_NOTES made after this file was packaged into the release artifacts can be found here:
https://github.com/apache/royale-asjs/wiki/Release-Notes-0.9.7
Apache Royale Compiler 0.9.7
- Definitions containing
[JSModule]with a custom module name are no longer required to use strict camelCase naming scheme. - Added Flex emulation RPC WebService partial support
- Fix add event handler code in renderers and inline Components
- (SWF/JS) Added support for
[RoyaleArrayLike]metadata-driven support for proxying compile-time numeric-typed array index access to get/set method calls and also specific for-in/for-each-in loop support. - (JS) Compiler updates to support more e4X variations/scenarios, including 'use namespace' and 'default xml namespace' directives
- (JS) Compiler updates to address custom namespace-related output, and reflection support
- (JS) Compiler updates to output more compact Reflection data
- Fixed a compiler memory leak that was occurring over multiple compilations
- Fixes in bindable code generation for accessors, and in bindable function generation for swf
- Fixed
-show-binding-warnings=falseoption to switch off binding warnings - Maven: Many fixes, improvements and Updates
- Support for Maven distribution (Create SDK with Maven)
- (JS) Prevent renaming of public variables in release builds so that they may be set from MXML.
- (JS) Fix conflict between methods of the same name in superclass and subclass, where the superclass method is private and the subclass method is public.
- (JS) Added
-jsx-factorycompiler option to customize the factory method used in code generated from [JSX]. - (JS) Added
-inline-constantscompiler option that optionally replaces references to contants with their value when the value is a primitive (like numeric, boolean, or string). - (SWF/JS) Added
-warn-this-within-closurecompiler option that controls whether the compiler emits warnings when referencingthisin closures or anonymous functions. - (SWF/JS) Added
-strict-identifier-namescompiler option to make the compiler emit errors when using certain keywords as identifiers, to match the old behavior of the Flex SDK compiler. - (SWF/JS) Fix metadata attributes being ignored if they did not have a value. Example: async was ignored in
[Test(async)]. - (SWF/JS) Fix path resolving error when specifying a source file with ./ or .\ on the command line.
- (SWF/JS) Fix
[ArrayElementType]being ignored when setting the[DefaultProperty]in MXML. - (SWF) Fix mxmlc and compc scripts in the bin folder that didn't work from the command line.
- (SWF/JS) Fix incorrect resolving of a property with a different namespace than the parent element in MXML. Properties must have the same namespace as the component, just like in Flex.
- (SWF/JS) Fix missing error for values that cannot be parsed as text in MXML.
- (JS) Fix stripped end quotes from strings in data binding expressions in MXML.
- (Maven) Added missing MXML manifest for core language types like Object, Array, Number, String, Boolean, etc.
- (JS) Fixed null reference error on source map generation with certain folder hierarchies.
- (JS) Fixed lost UTF-8 encoding when using remove-circulars.
- (SWF/JS) Fix missing error when setting private/inaccessible property in MXML.
- (JS) Fix "missing var keyword" warning from Closure compiler for type definitions.
- (SWF/JS) Fix missing error for calling a getter as a function (similar to attempting to call a variable as a function) when it is the wrong type.
- (JS) Fix missing . in generated JS when using static getter/setter in a custom namespace.
For additional information on recent issues that have been closed, see Github Issues List
You can download a binary distribution, the source code or browse our GitHub repositories. If you're a NPM user you can check Apache Royale at NPM.
As well, you can help us filing bug reports for issues you encounter in the framework or compiler.
For questions about how to use Royale, send email to mailto:users@royale.apache.org. For questions and feedback on the development of the source code in the release, send email to dev@royale.apache.org.
Enjoy! 🙂
Working with vector graphics
This example shows some ways you can work with vector graphics in Apache Royale. Since Royale draws in part from the sources of Flash and Flex technologies, you'll find that the powerful Flash drawing API is supported for JavaScript and SWF applications. On the other hand, Apache Royale also supports use of SVG graphics.
In this example we create an Erlenmeyer flask, a measuring and mixing container for laboratories, that we can fill with some kind of strange green fluid. We can change the level of the fill with a Jewel HSlider, and use a ToggleButton to show or hide an indicator of the maximum level the liquid can reach. The bottle is be a static SVG shape and the fluid is drawn at runtime as the code responds when the slider value changes.
Example structure
We're using the Jewel UI set to build a simple interface as a placeholder for the example. We use a Jewel Card; the Jewel HorizontalCenteredLayout centers the card in the card on both axes.
As usual, the Card has three sections: a CardHeader (with the title), a CardPrimaryContent (that holds the bottle) and a CardActions (with some controls).
This is the main structure:
<j:Card width="460" height="680">
    <j:CardHeader>
        <html:H3 text="Working with vector graphics" className="primary-normal"/>
    </j:CardHeader>
    <j:CardPrimaryContent itemsHorizontalAlign="itemsCentered">

        <!-- Here will have the bottle -->

    </j:CardPrimaryContent>
    <j:CardActions itemsHorizontalAlign="itemsRight" itemsVerticalAlign="itemsCentered">
        <j:BarSection width="50%">

            <!-- Here will go the ToggleButton -->

        </j:BarSection>
        <j:BarSection width="50%" itemsHorizontalAlign="itemsRight">

            <!-- Here will go the Slider -->

        </j:BarSection>
    </j:CardActions>
</j:Card>
With this code in place we can…
Create the bottle
We use SVG graphics to assemble the flask, and ActionScript 3 code using the powerful Flash drawing API to create and manage the liquid. We're using both to show you both options so you have more weapons in your arsenal.
For the flask, I created three SVG files using a design tool. You can use whatever tool you prefer to draw vector art and export it in SVG format. I used Affinity Designer software to create it since I think it's one of the best professional and modern tools available today. But many other free, open source and commercial options are available, so choose whatever you want.
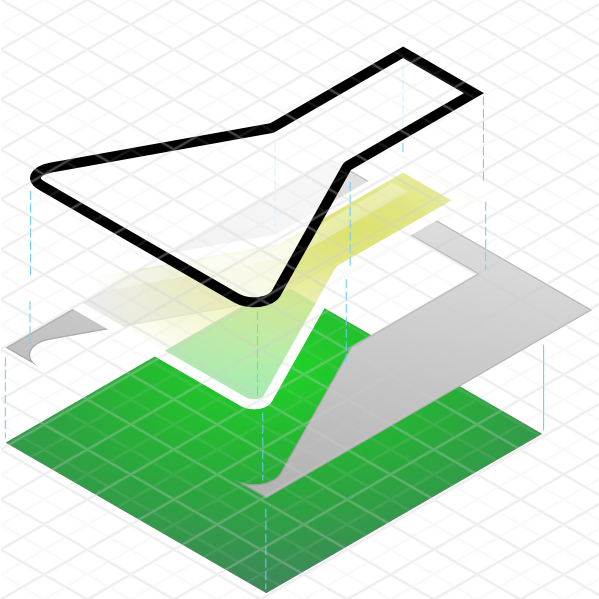
The flask's three files are: A mask, a shade (with some reflections and gradients) and the main flask shape. I loaded the files with the svg:Image Royale component. Then I added a red indicator line coded In SVG directly in Royale to show that option with svg:Rect. Finally the fluid uses the UIGraphicsBase class that lets you work with the Flash drawing API.
I added all the parts to a Jewel Container so I can position them in relation to each other as layers. The Container clips the content so things that fall outside the container boundaries are hidden.
You can see all the pieces in perspective in the following image:
Here is the final code of the Container that composes all the graphic parts:
<j:Container localId="fgShape" width="400" height="500">

    <!-- liquid -->
    <js:UIGraphicsBase localId="bgShape" width="400" height="500"/>

    <!-- rule -->
    <j:Group>
        <svg:Rect localId="rule" x="180" y="{bgShape.height - rule.height}" width="6" height="350">
            <svg:fill>
                <js:SolidColor color="#ff0000" alpha=".5"/>
            </svg:fill>
        </svg:Rect>
    </j:Group>
    <!-- fill mask -->
    <svg:Image src="assets/bottle-mask.svg" width="400" height="500"/>
    <!-- inner shade -->
    <svg:Image src="assets/bottle-shade.svg" width="400" height="500"/>
    <!-- main shape -->
    <svg:Image src="assets/bottle-main.svg" width="400" height="500"/>

</j:Container>
Notice that the fluid is declared first so the other shapes can hide the fluid that is outside the flask shape.
Fluid controls
To provide some interactivity we add a ToogleButton and an HSlider. The button lets you show and hide the indicator line; move the slider to change the fluid level from empty to full.
The ToogleButton has the following code:
<j:ToggleButton localId="ruleVisibility"
    outlined="true" emphasis="emphasized"
    text="Hide Rule" selectedText="Show Rule" selected="true">
    <j:icon>
        <js:ToggleFontIcon text="{MaterialIconType.VISIBILITY_OFF}" selectedText="{MaterialIconType.VISIBILITY}" material="true"/>
    </j:icon>
</j:ToggleButton>
It uses an outlined style with emphasized coloring, and material icons and texts for both selected and unselected states.
Show and Hide the indicator with binding
We control the visibility of the red indicator line with the data binding Royale feature:
First add ApplicationDataBinding to the application beads to make Royale support binding at that level (Remember that Royale is PAYG, so we only add code when it is really necessary instead of adding lots of code that you probably will never use to every component).
Then add the binding to the Group that holds the rule.
<!-- rule -->
<j:Group visible="{ruleVisibility.selected}">
When you run the application, click the button to show and hide the red indicator.
Add the slider
We finish the action controls part by adding a label and a slider in the last BarSection of the CardActions. The slider lets you change the fluid level.
<j:Label text="Slide to fill"/>
<j:HSlider localId="slider" value="0" minimum="0" maximum="500"/>
Drawing the fluid
Using the drawing API in Royale is easy, and well-supported by both JavaScript and SWF. We get the Graphics instance of the UIGraphicsBase object in the following way:
var g:Graphics = Graphics.getInstanceFor(bgShape);Now we can use the graphics object to invoke drawing functions like moveTo, lineTo, and more.
To draw the fluid we use the following function using fills, lines and quadratic bezier curves:
/**
 * Draw the liquid to fill the bottle
 */
private function drawLiquid(g:Graphics, color:Number, alpha:Number, x:int, y:int, width:int, height:int, wave:int):void {
    if(y > height)
        y = height;
    g.beginFill(color, alpha);
    g.moveTo(x, height);
    g.lineTo(x, y);
    g.curveTo(width / 4, y - wave, width / 2, y);
    g.lineTo(width / 2, y)
    g.curveTo(width * 3 / 4, y + wave, width, y);
    g.lineTo(width, height);
    g.lineTo(x, height);
    g.endFill();
}
Then to join all the pieces we add a valueChange event handler to the HSlider:
<j:HSlider localId="slider" value="0" minimum="0" maximum="500" valueChange="changeFill(event)"/>The changeFill function is the following:
/**
 * Fill the bottle
 */
private function changeFill(event:ValueChangeEvent):void {
    var g:Graphics = Graphics.getInstanceFor(bgShape);
    var newHeight:Number = transformValueFromRange(slider.value, slider.minimum, slider.maximum, 0, rule.height);
    var newY:Number = fgShape.height - newHeight;

    g.clear();
    drawLiquid(g, liquidColor, .5, 0, newY, 400, 500, -15);
    drawLiquid(g, liquidColor, 1,  0, newY, 400, 500, 30);
}
When we change the HSlider position, the code calls the function, gets the graphic object, calculates the new height value based on the current container height (transforming ranges), clears all drawings and redraws two different liquids with some displacement on X and change on the wave length with the new values.
And that's all! I hope you like this drawing feature in Royale. You'll be able to do many creative things in your Royale applications with it!
As always, enjoy!
Where to go from here
- Apache Royale Data Binding documentation page
- Apache Royale Jewel UI Set documentation page
- Jewel HSlider Royale Docs page
- Jewel Card Royale Docs page
The result of this code snippet is the following:
(We're using an iframe to host the actual results of this example compilation. To see the example in a separate window click this link.)
Full project with source code can be found here:
How to create a Desktop Application with Royale and Electron
With Apache Royale and Electron you can publish your projects to desktop applications. In this guide you'll learn how to do that.
The short version is to create an Electron project, create an Apache Royale project inside of that and then point the Electron app to the generated Apache Royale html page. You then communicate through the ipcRenderer. We'll be using Visual Studio Code for this guide. The complete example project is attached at the end.
Prerequisites:
- Install Visual Studio Code – Link
- Install ActionScript & MXML plugin (required – also included in the extension pack below) – Link
- Install npm (required) – Link
- Install Apache Royale SDK (required) – Link
- Install Electron plugin – Link
- Install Firefox Debugger plugin – Link
- Install Git – Link
- Extension pack that includes AS3 & MXML plugin, AS3 projects and AS3 snippets – Link
Create an Electron project
A basic Electron application needs just these files:
- package.json – This points to the app's main file and lists its details and dependencies.
- main.js – Starts the app and creates a browser window to render HTML. This is the app's main process.
- index.html – A web page to render. This is the app's renderer process.
You also need a reference to an Electron development instance. This can be in the form of a /node_modules directory in your project or a reference to another external location. We will show two ways to reference it.
Creating a New Project
Visual Studio Code doesn't have a New Project menu option that you might be used to from using Flash Builder or other IDEs. Some extensions will set up new projects for you.
Instead you create a folder and define configuration files in the folder. Visual Studio Code then looks for those settings and uses them to set up the environment and provide code intelligence.
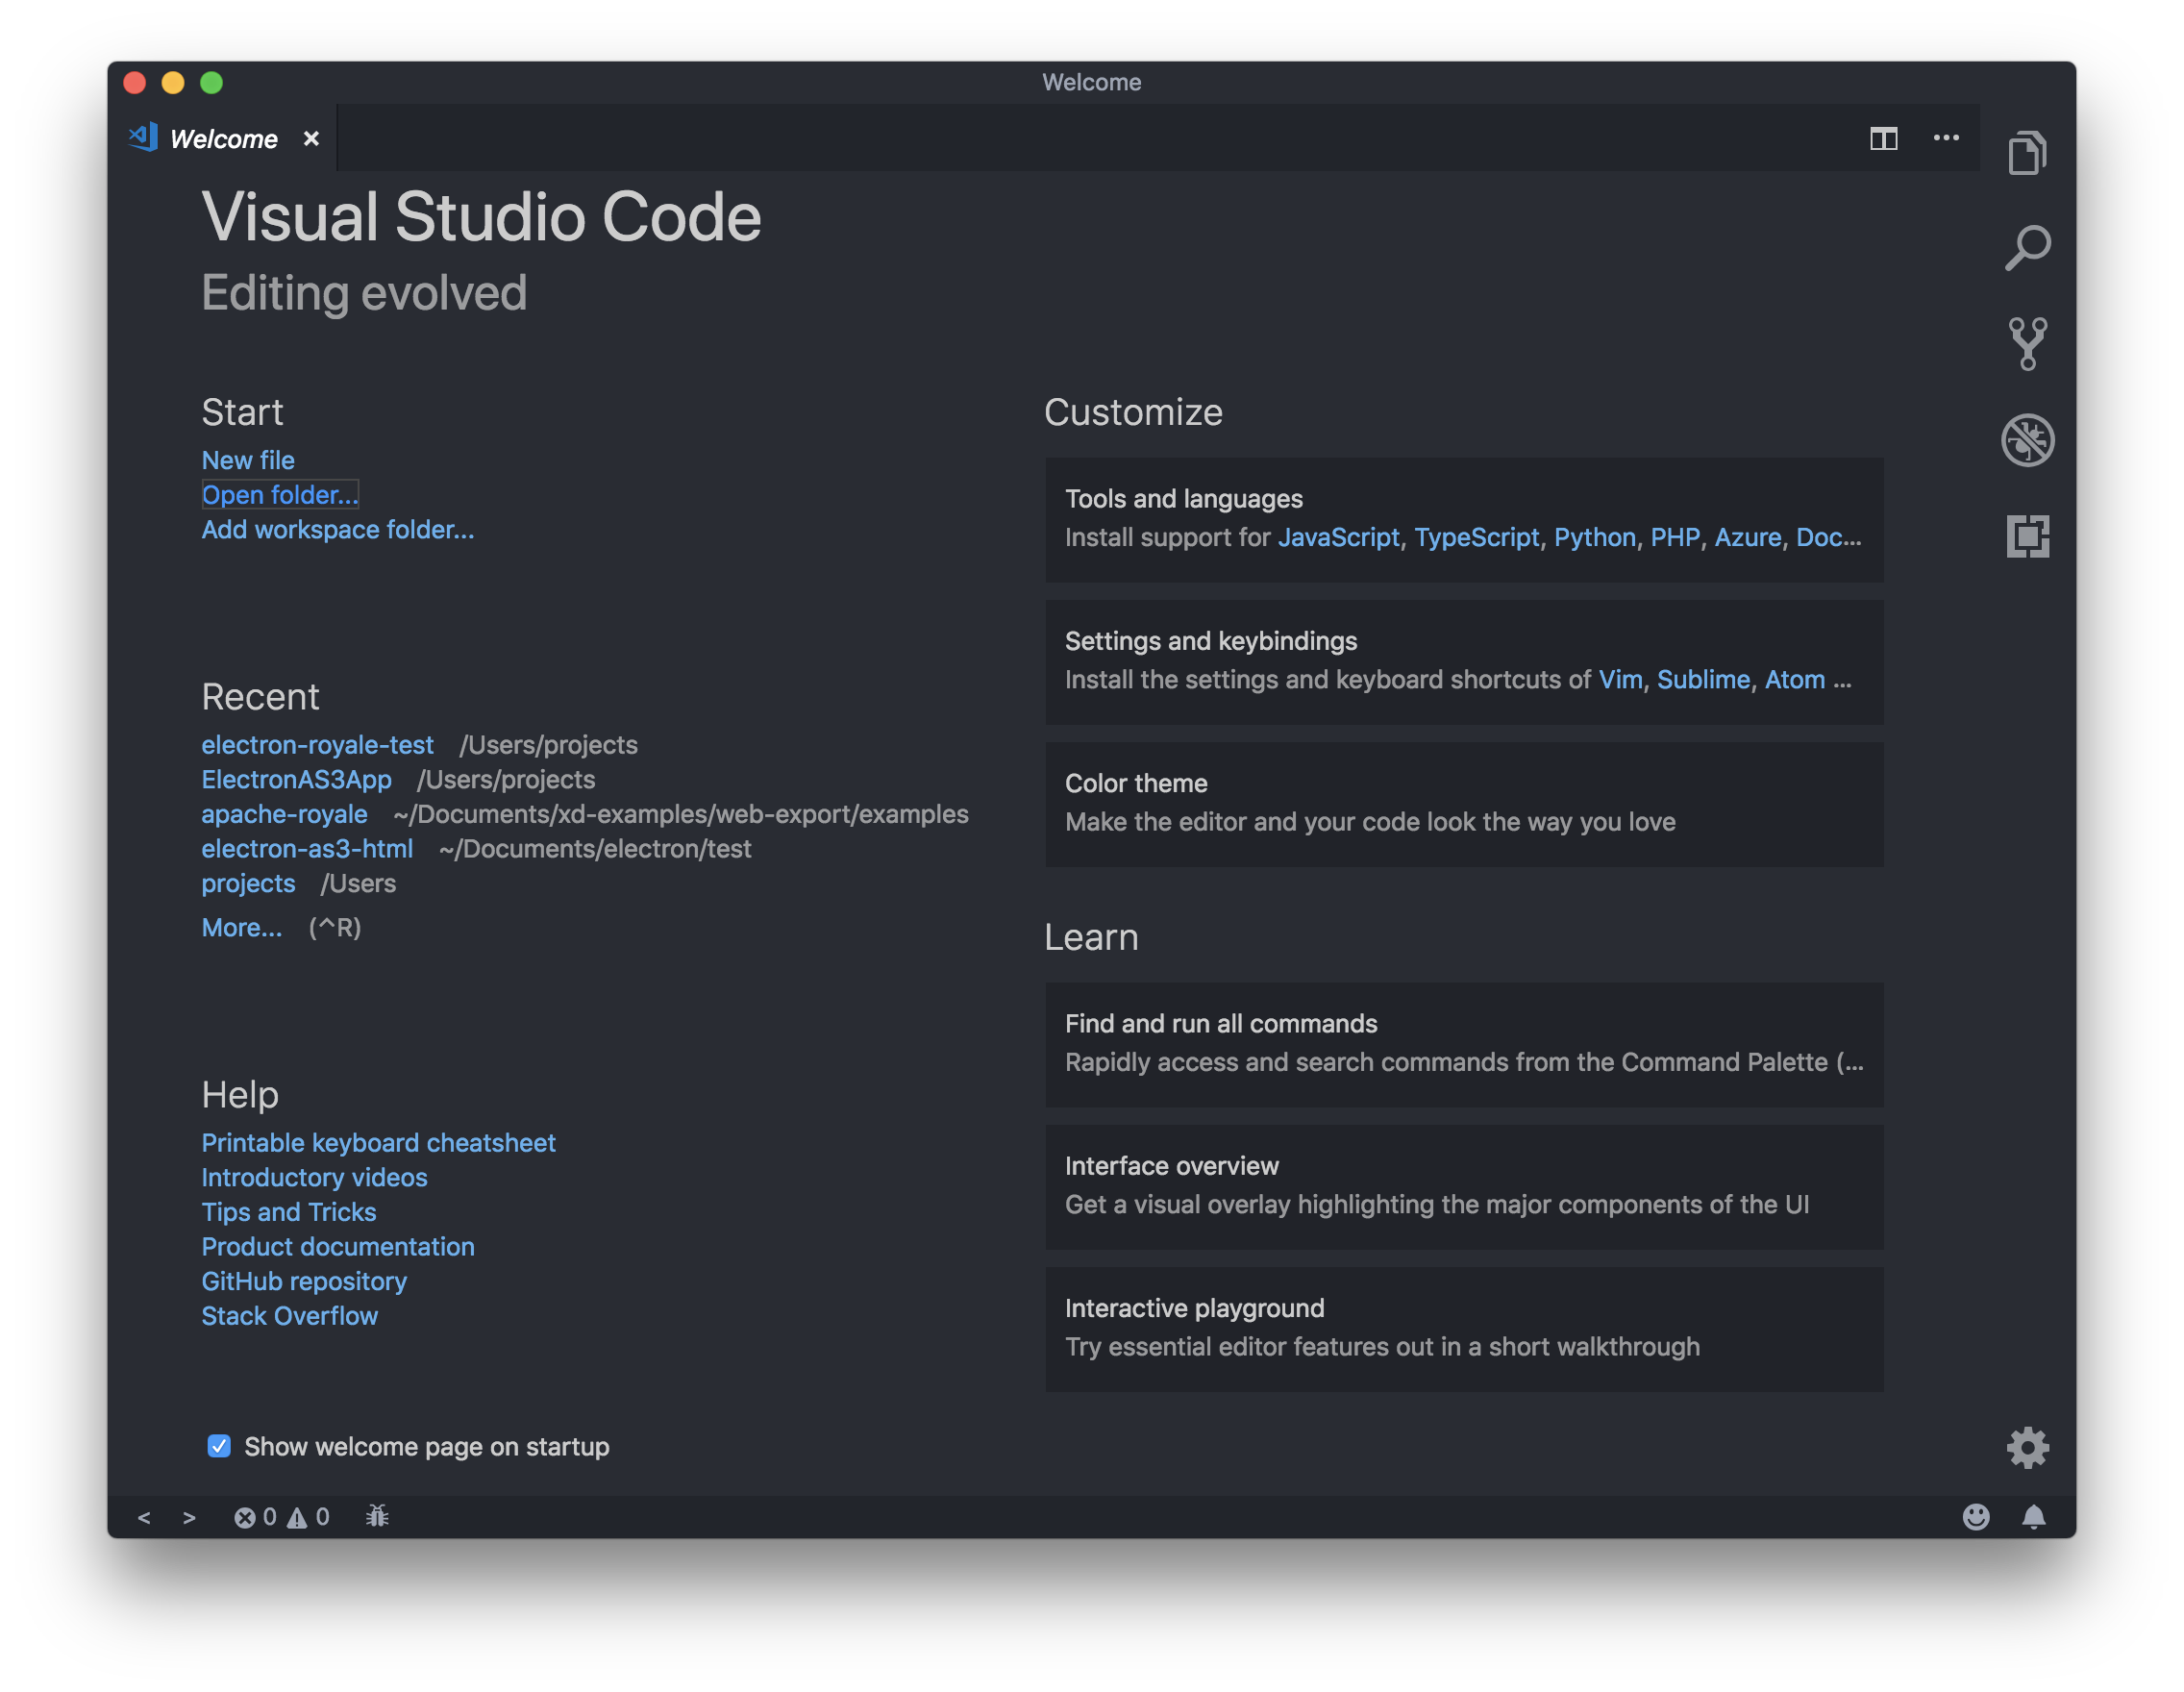
Open Visual Studio Code (if it is open already, create a new instance with Command + Shift + N or Control + Shift + N) and then click on Open Folder.
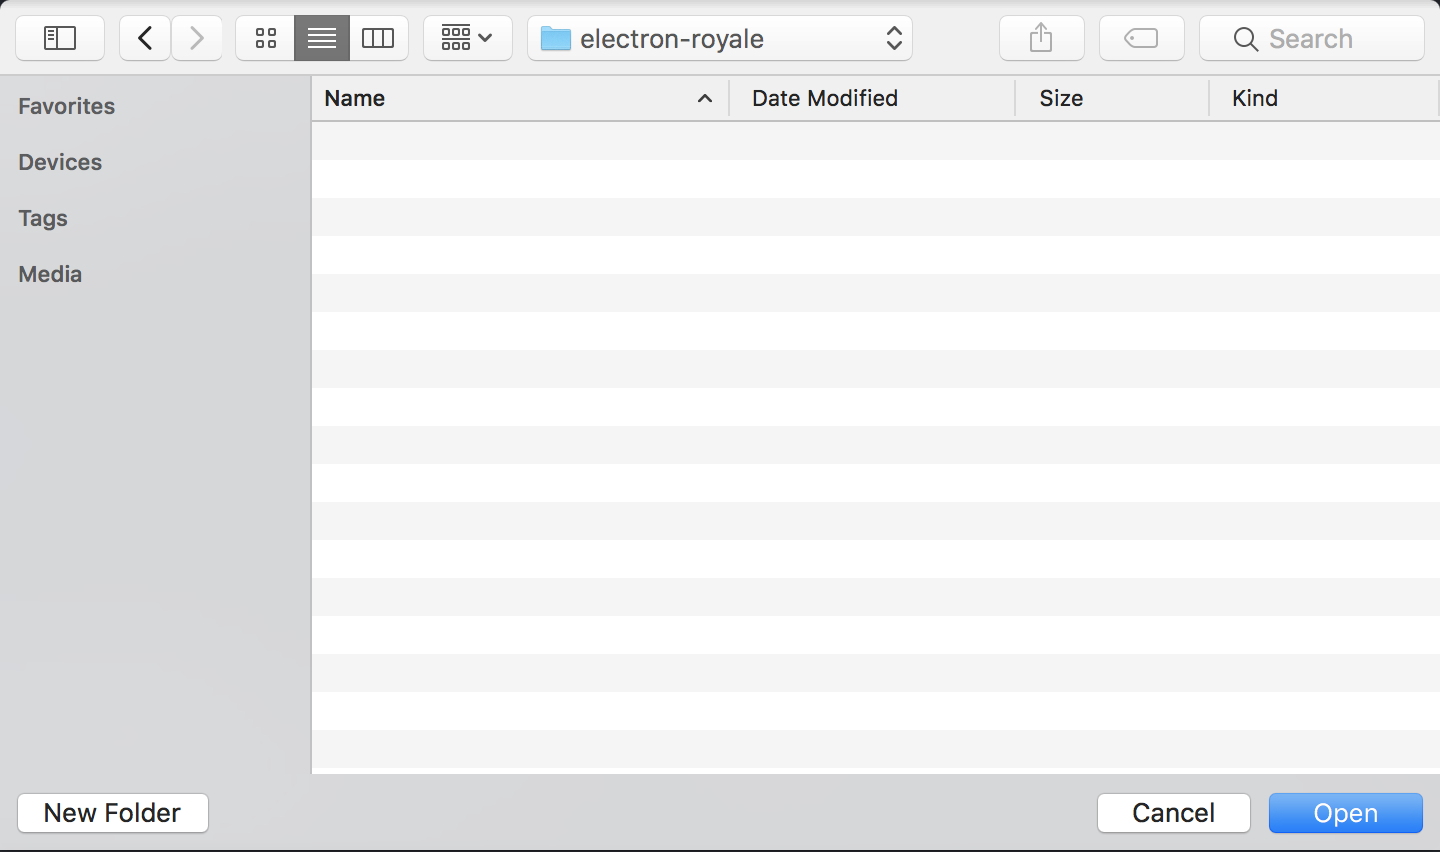
Create a new folder named "Electron-Royale", select it and then click Open.
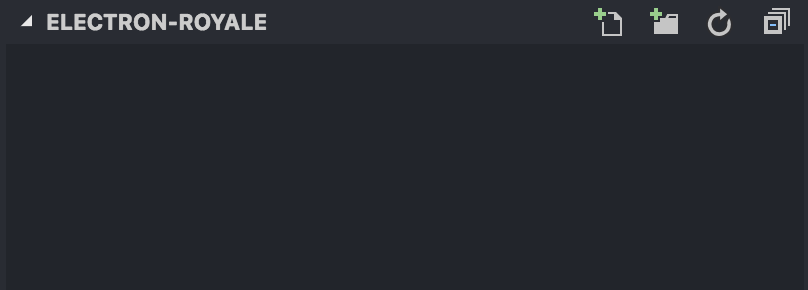
A new Explorer section opens.
![]()
New Visual Studio Project (showing Welcome screen)
On the right side of the screen (or left) you see the Explorer section. Under that you the "Electron-Royale" area. That is our project folder.
In the heading are the New File, New Folder, Refresh and Collapse buttons. They appear when you hover the mouse pointer over the header area.
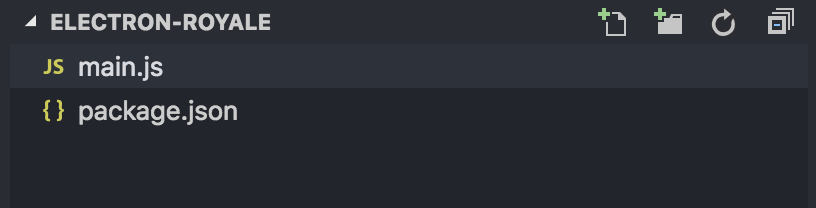
Project Folder
Open files appear in the Open Editors view:

Open Editors area
If the Welcome screen is still open, click the X button to close it.
For an Electron app we create this folder structure:
your-app/
├── package.json
├── main.js
└── index.html
If you haven't created an Electron app before, read this short overview page and then return here.
There are extensions that can create the project for us but we're going to do it by hand for this guide. Why? You will be editing these options frequently until the project is set up.
Create the package.json in the root directory by clicking the New File button and adding the following:
{
   "name": "electron-royale-app",
   "version": "1.0.0",
   "description": "Electron and Royale",
   "main": "main.js",
   "scripts": {
      "start": "electron ."
   },
   "devDependencies": {
      "electron": "^5.0.1"
   }
}
You could also create the package.json project by using the npm init command.
Open a new Terminal window (built in to Visual Studio Code):
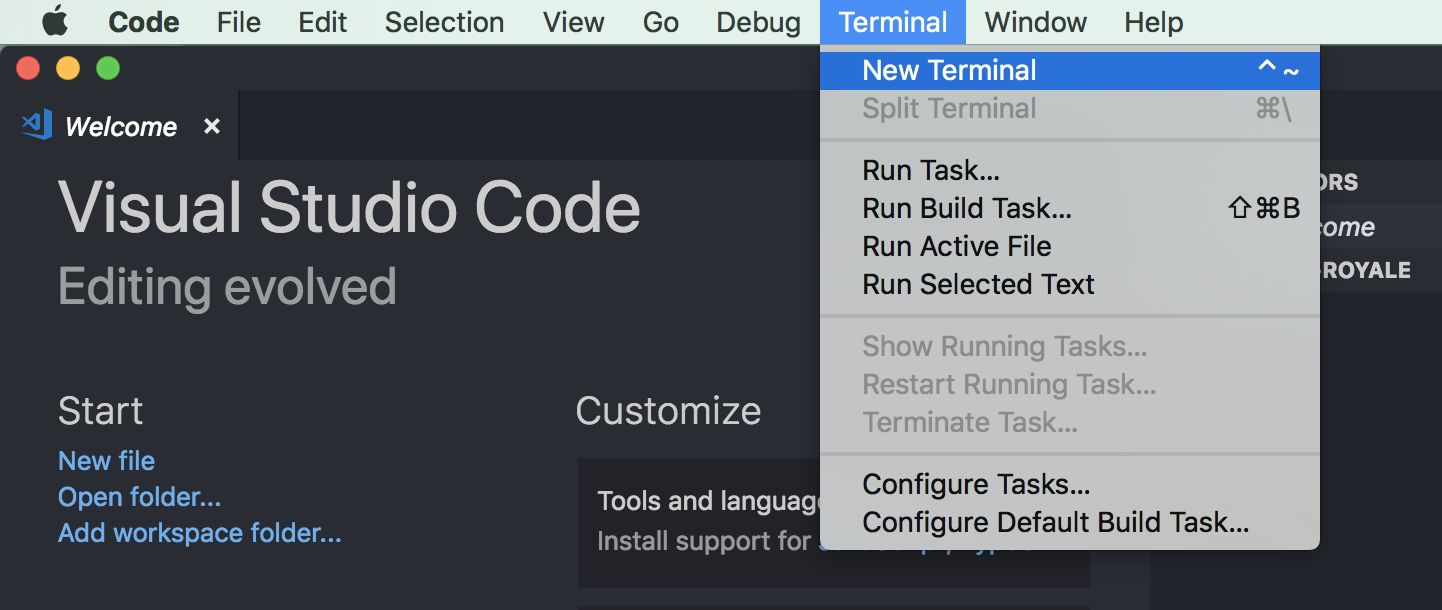
New Terminal Window
In the Window that opens enter the following command and follow the prompts:
npm initYou can simply press enter multiple times and type the values into the editor afterwards:
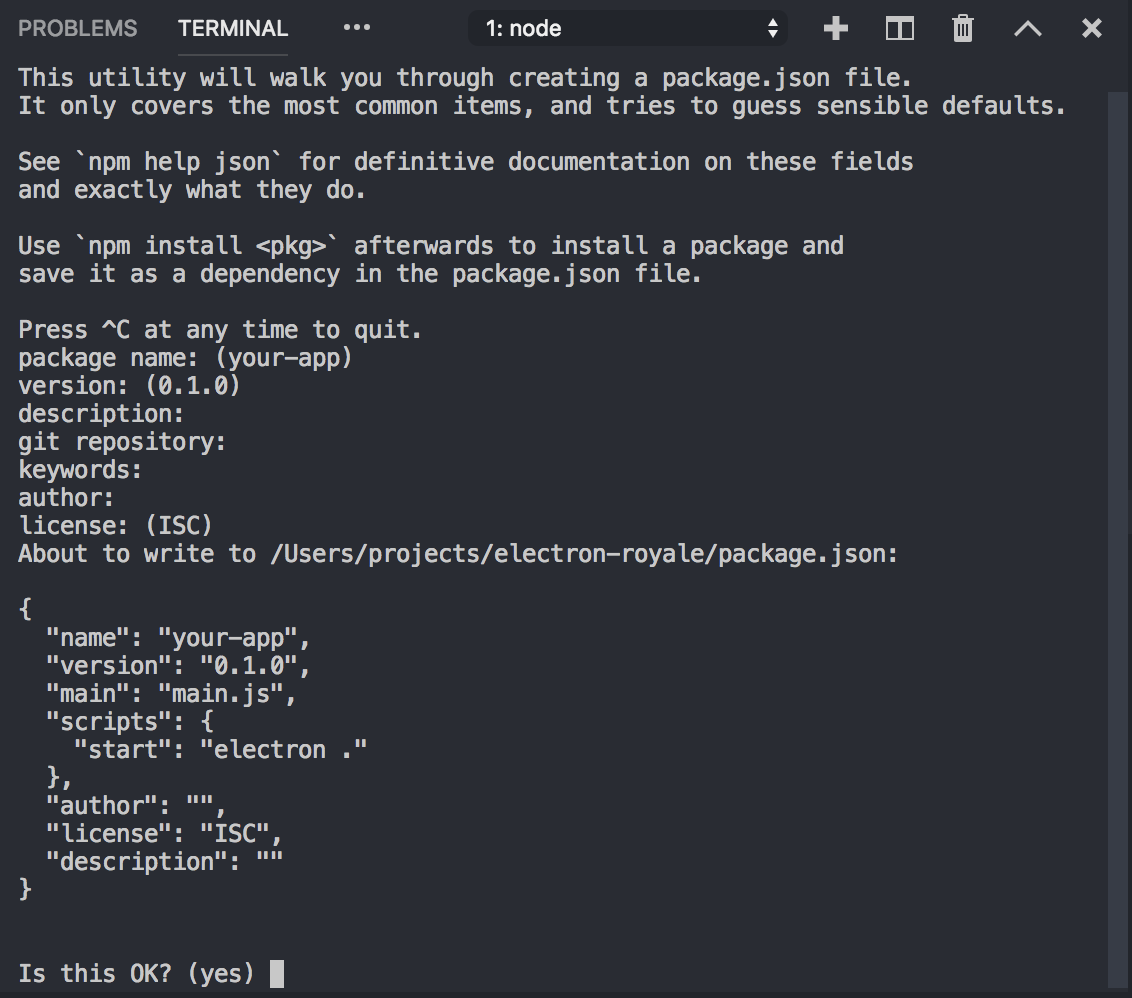
Prompts from npm init
Type yes to confirm. Visual Studio creates a new package.json file in the root directory. A few of the values will be different, so set them back to the values we have above.
Now we create the main Electron js file main.js. Note: There are other examples that use index.js instead.
Click the New File button and name the file main.js:
Main js
Again, read this overview page if you are new to Electron, and then return here.
Enter the following for main.js:
const { app, BrowserWindow } = require('electron')

// Keep a global reference of the window object. If you don't, the window will
// close automatically when the JavaScript object is garbage collected.
let win

function createWindow () {
  // Create the browser window.
  win = new BrowserWindow({
    width: 800,
    height: 600,
    webPreferences: {
      nodeIntegration: true
    }
  })

  // and load the index.html of the app.
  win.loadFile('index.html')

  // Open the DevTools.
  //win.webContents.openDevTools()

  // Emitted when the window is closed.
  win.on('closed', () => {
    // Dereference the window object, usually you would store windows
    // in an array if your app supports multi windows, this is the time
    // when you should delete the corresponding element.
    win = null
  })
}

// This method will be called when Electron has finished
// initialization and is ready to create browser windows.
// Some APIs can only be used after this event occurs.
app.on('ready', createWindow)

// Quit when all windows are closed.
app.on('window-all-closed', () => {
  // On macOS it is common for applications and their menu bar
  // to stay active until the user quits explicitly with Cmd + Q
  if (process.platform !== 'darwin') {
    app.quit()
  }
})

app.on('activate', () => {
  // On macOS it's common to re-create a window in the app when the
  // dock icon is clicked and there are no other windows open.
  if (win === null) {
    createWindow()
  }
})

// In this file you can include the rest of your app's specific main process
// code. You can also put them in separate files and require them here.
Note: Some code may be affected by the copy and paste process. If any code is encoded into HTML entities then you will see an error. Simply convert them back to the greater than or less than characters. Use the example project at the end for comparison.
We then need to create an HTML page to display in our Electron app.
Click the New File button, name it index.html and then enter the following value:
<!DOCTYPE html>
<html>
  <head>
    <meta charset="UTF-8">
    <title>Hello World!</title>
  </head>
  <body>
    <h1>Hello World!</h1>
    We are using node <script>document.write(process.versions.node)</script>,
    Chrome <script>document.write(process.versions.chrome)</script>,
    and Electron <script>document.write(process.versions.electron)</script>.
  </body>
</html>
We have one last step before running our project. We need the Electron node_modules folder (or a reference to it).
We can install this folder locally to our project or, if we've installed the Electron plugin, we can use that.
Let's use the extension first and then do it manually after.
Install the Electron plugin above and then click the Debug button that runs along the edge of Visual Studio Code. When you click it, it opens the Debug view:

Here you can launch different tasks, including debugging your application.
Click the No configurations dropdown list and you'll see Add Configuration. Click that.
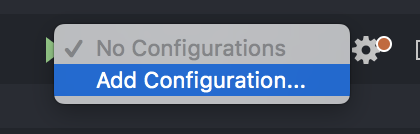
Add Configuration option
This will show a list of options, including one called Electron. Select this option.
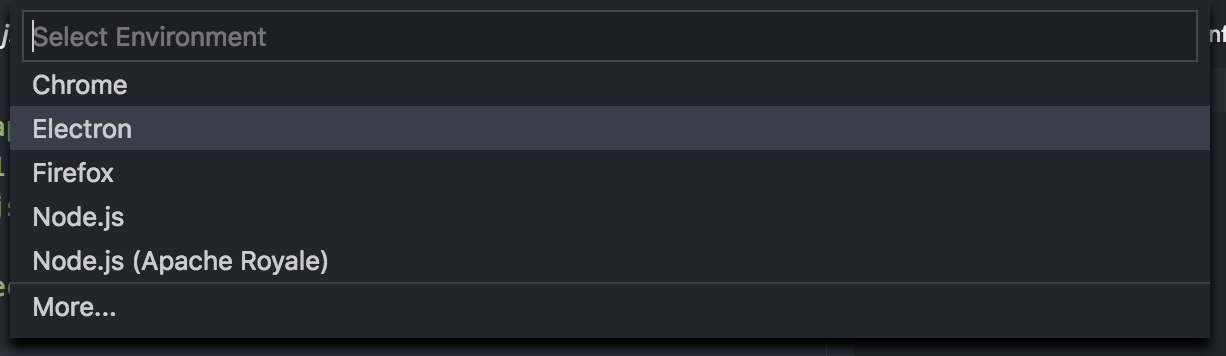
Electron Launch Configuration
When you select Electron from the dropdown list, a launch.json file is created and placed in a .vscode folder in the root of your project, and the launch.json file opens in an editor tab.
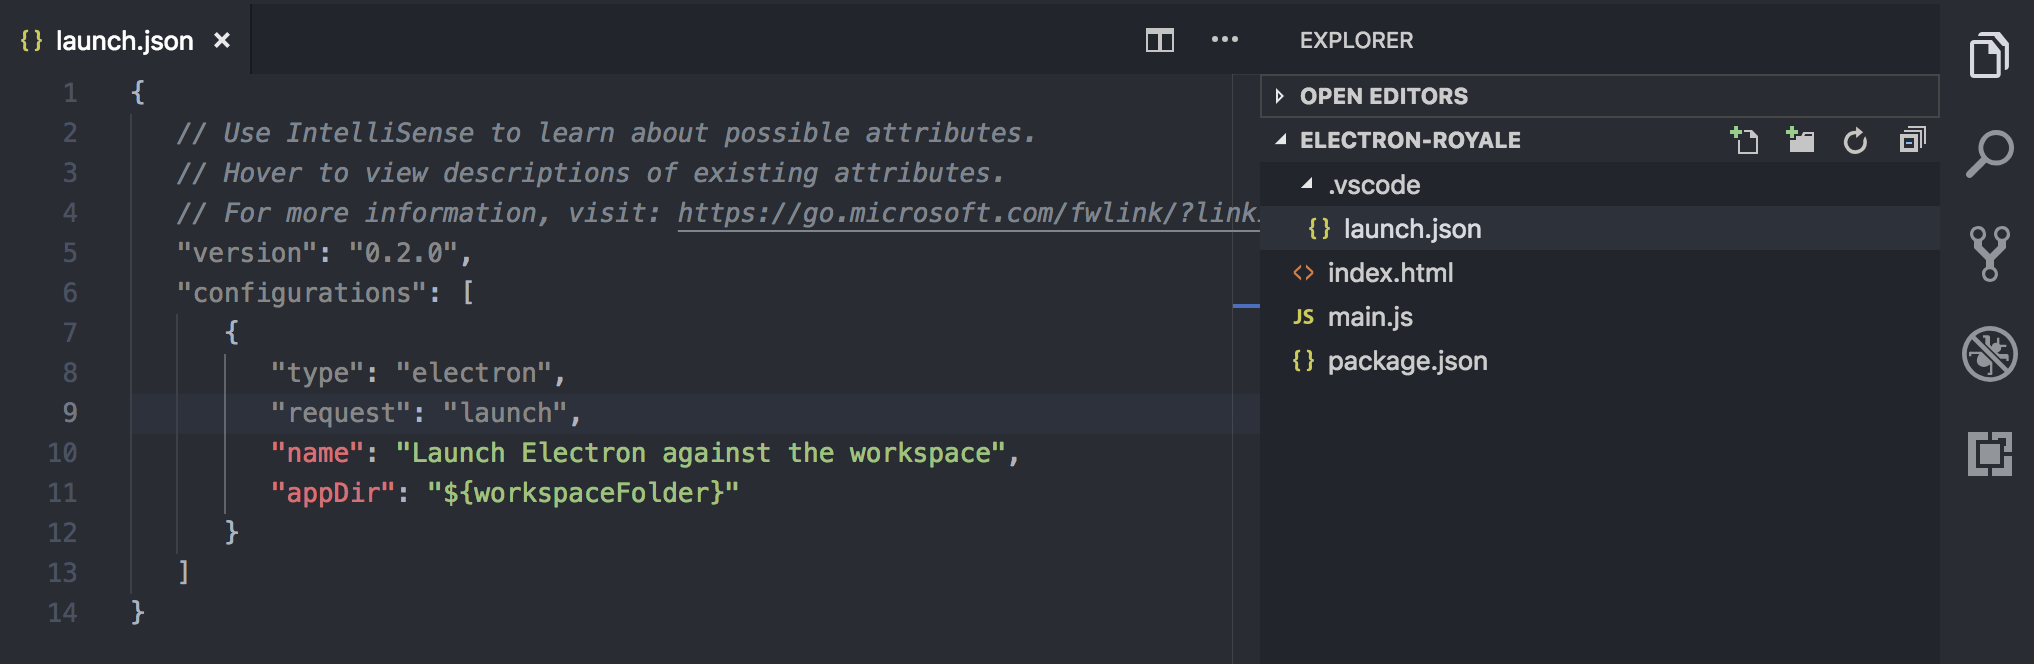
Launch Configuration
You can see the configuration is a simple JSON string like our other configurations.
Let's update the name to Launch Electron and save the document. You can see the name updated in the Debug view:

Launch Electron button
Now, to launch your first Electron app you can use npm start from the Terminal view, or you can click the Launch button in the Debug view. For this guide use the Launch button.
If everything went correctly your first Electron app appears. Congratulations!

Hello World in Electron
Shortly after opening it it will show the Chrome dev tools:

Dev tools
You can use the Dev tools to set breakpoints, inspect the page elements and more.
Let's prevent the dev tools from opening for now. You can re-enable them later.
Open main.js and find and comment out or remove the line below, then save the document:
win.webContents.openDevTools();When you're debugging a session in Visual Studio Code a debug bar appears:

Debug bar appearing
Use that to Pause, Continue, Step Over, Step Into, Step Out of, Reload or Stop your app. You can dock this bar through an option in the VSC preferences… Code > Preferences > Settings > Tool bar location > docked.
Install Electron in the Project
We can set up Electron manually as well, and in this case we install it inside the project folder.
The reason to install it in the project is so we can switch between different versions and maintain control of our dependencies. The downside is that the project has to download an Electron instance and each project instance will take up additional space. If you work on a project on a team it's recommended to keep the instance in your project but not to commit it into version control.
Note: We can have Electron installed inside our project and use the electron install from the Electron plugin or reference another instance externally. Our launch configurations will allow that.
We are going to install Electron in to our root project directory.
Close the app if it is open by going to the menu and choosing Quit your-app.
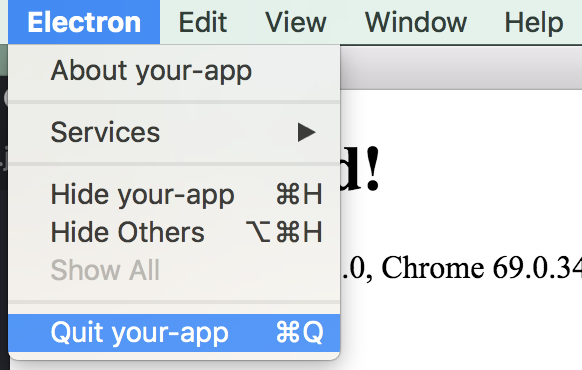
Quit menu
Open the built in Terminal and enter the following npm command:
npm install --save-dev electronElectron will begin downloading the node_modules and its progress will show in the Terminal view:
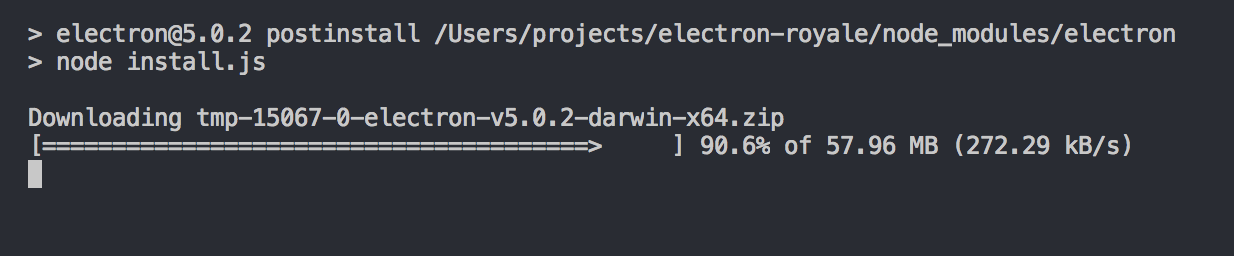
Downloading…

Download Complete
When the download is complete you see a new folder in your project called node_modules:
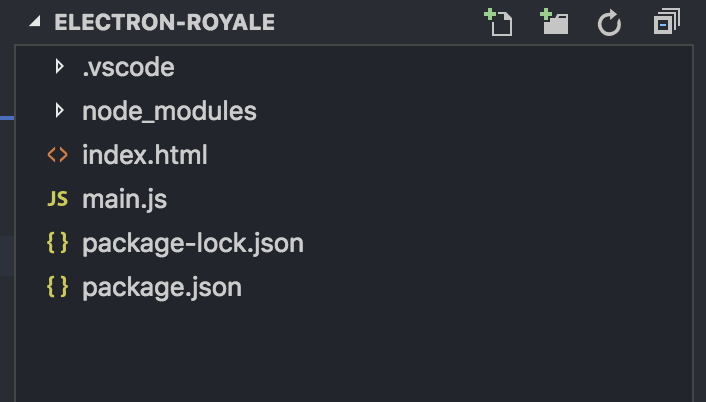
Node installed locally
You will also see that npm install creates a package-lock.json file.
The file package-lock.json is like a quick save for your project. Using it, you or your teammates can restore the dependencies to a specific versioned state. It's described more here, here and here. Commit this configuration instead of the node_modules directory when using version control.
Once the Node modules have been downloaded we may need to manually create the .vscode directory and the launch.json configuration. Create the .vscode directory and launch.json file and enter the value below:
{
   "version": "0.2.0",
   "configurations": [
      {
         "name": "Debug Main Electron Process",
         "type": "node",
         "request": "launch",
         "cwd": "${workspaceRoot}",
         "runtimeExecutable": "${workspaceRoot}/node_modules/.bin/electron",
         "windows": {
            "runtimeExecutable": "${workspaceRoot}/node_modules/.bin/electron.cmd"
         },
         "args" : ["."],
         "outputCapture": "std"
      }
   ]
}
Since the launch.json already exists we can add our new configuration settings to it.
BTW notice in the launch configuration above that the type is node and that runtimeExecutable options are defined.
Let's add our new manual configuration next to our existing extension-created configuration. Open launch.json config and use the values below:
{
   "version": "0.2.0",
   "configurations": [
      {
         "type": "electron",
         "request": "launch",
         "name": "Launch Electron",
         "appDir": "${workspaceFolder}"
      },
      {
         "name": "Debug Main Electron Process",
         "type": "node",
         "request": "launch",
         "cwd": "${workspaceRoot}",
         "runtimeExecutable": "${workspaceRoot}/node_modules/.bin/electron",
         "windows": {
            "runtimeExecutable": "${workspaceRoot}/node_modules/.bin/electron.cmd"
         },
         "args" : ["."],
         "outputCapture": "std"
      }
   ]
}
You'll see why we have added both later.
I recommend you read about the Electron Architecture here and then continue.
You can read more here:
- Electron Quick Start – link
- Electron Quick Start project – link
- Your first Electron project – link
- Electron Architecture – link
Create an Apache Royale project
Now we are going to create our Apache Royale project.
Make sure you have the AS3 & MXML extension installed as mentioned above. This requires Java 1.8. An install page is listed here.
Once the extension is installed you need to point to the Apache Royale SDK in the project. We will do it manually and you can see how to have the extension do it at the link provided earlier.
Open the Explorer view and open the .vscode directory.
In that directory create a settings.json file:
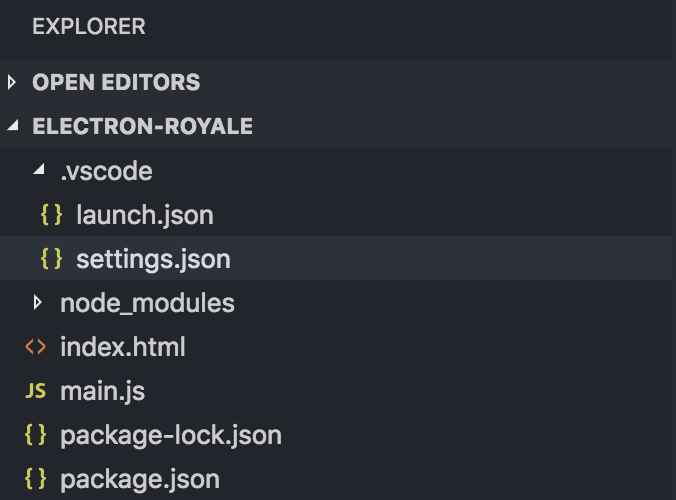
Apache Royale SDK settings.json
Enter the following text:
{
   "as3mxml.sdk.framework": "/Users/user/Documents/Royale_SDK/apache-royale-0.9.4-bin-js/royale-asjs"
}
That will not work as is. You need to enter the path to the directory where you downloaded and installed the Apache Royale SDK.
There is a more in-depth guide here that shows how to set up the SDK with the help of the AS3 & Flex extension. You can use the information to confirm the SDK is available to your project.
Once the SDK is set up you'll need to add an asconfig.json to your project. The asconfig.json file is used to add code intelligence to AS3 and MXML files.
Open the Explorer view, select the root project directory, and create a new file with the New File button. Name it asconfig.json.
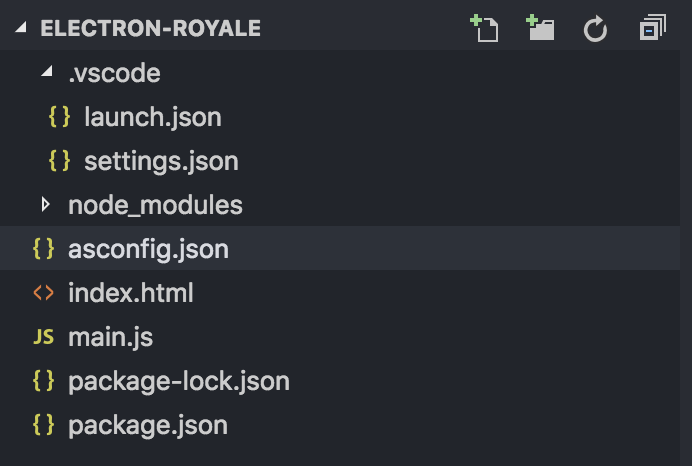
asconfig in project directory
Open the asconfig.json file and enter the following:
{
   "compilerOptions": {
      "source-map": true,
      "html-template": "index.html",
      "theme": "${royalelib}/themes/JewelTheme/src/main/resources/defaults.css"
   },
   "additionalOptions": "-warn-public-vars=false",
   "files":
   [
      "src/HelloWorld.mxml"
   ]
}
Notice the page we are pointing to in the html-template option. This is the Electron index.html page. We will use this as the Royale app template page.
Note: We can use any page as a template but we need to update the page with special tokens that the Apache Royale compiler looks for.
Note: In the theme option we have a token for royalelib. If you have any issues with this, if the components do not look like they have any theme, then you may have to use the full path to your Royale install.
For example, you may have to use something like:
"C:/ApacheFlexInstall/apache-royale-0.9.6-bin-js-swf/royale-asjs/frameworks/themes/JewelTheme/src/main/resources/defaults.css"Note: We can add another configuration option called config that will provide us with code intelligence for the node APIs (see first line).
{
   "config": "node",
   "compilerOptions": {
      "source-map": true,
      "html-template": "index.html",
      "theme": "${royalelib}/themes/JewelTheme/src/main/resources/defaults.css"
   },
   "additionalOptions": "-warn-public-vars=false",
   "files":
   [
      "src/HelloWorld.mxml"
   ]
}
This shows us classes and code completion for some Node APIs (possibly only for the Main process). The issue when we use this option is we get an error on the first line of our MXML document:
This tag could not be resolved to an ActionScript class. It will be ignored. js:Application
You can have this option enabled and choose to Debug anyway and it will run. For now, remove this option and add it in later if appropriate as needed.
Let's continue and update our HTML page to our HTML template.
Open the index.html page in the root of the project directory and enter the following HTML:
<!DOCTYPE html>
<html>
<head>
    <meta http-equiv="Content-Type" content="text/html; charset=utf-8">
    <meta name="Custom Template for injecting custom style CSS">
    <meta name="viewport" content="width=device-width, initial-scale=1.0, maximum-scale=1.0, user-scalable=no" />
    <link rel="stylesheet" type="text/css" href="${application}.css">
    <link href="//fonts.googleapis.com/css?family=Lato:400,700" rel="stylesheet">
${head}
</head>
<body>
${body}
</body>
</html>
Notice we have the ${head} and ${body} tokens.
Now we need to create a new directory for our application.
In the root of the project create a directory named src and create an MXML document in that directory named HelloWorld.mxml.
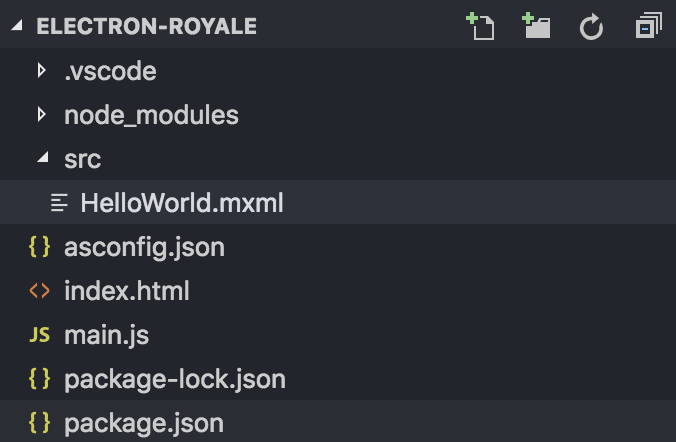
HelloWorld.mxml
In HelloWorld.mxml enter the following value:
<?xml version="1.0" encoding="utf-8"?>
<js:Application xmlns:fx="http://ns.adobe.com/mxml/2009"
   xmlns:js="library://ns.apache.org/royale/express"
   xmlns:html="library://ns.apache.org/royale/html"
   xmlns:j="library://ns.apache.org/royale/jewel">
   <js:initialView>
      <js:View>
         <js:Label id="helloLabel" text="Hello World" x="240" y="20"/>
         <j:Button id="helloButton" text="Hello" x="20" y="20"/>
      </js:View>
   </js:initialView>
</js:Application>
Create the Compile Task
To compile our Royale application we need to create a compile task. We can use the AS3 & MXML extension to create a compile task or we can do it manually.
Let's create a compile task manually and then maybe later create it with the extension.
In the .vscode directory create a tasks.json:
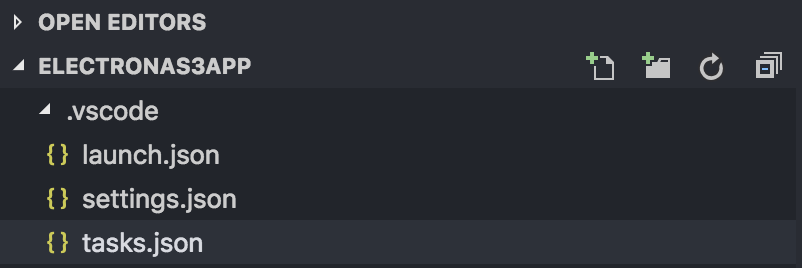
Tasks
In tasks.json add the following value:
{
   "version": "2.0.0",
   "tasks": [
      {
         "label": "Compile",
         "type": "actionscript",
         "debug": true,
         "group": {
            "kind": "build",
            "isDefault": true
         }
      }
   ]
}
For documentation about the tasks.json format go here.
Notice the label property. It is named Compile. We can name it anything, but for now name it Compile. We'll refer to this task later by name as a preLaunchTask.
Before we can launch our Apache Royale app we need to build it. Building it compiles the MXML and ActionScript into HTML and JS.
We can build it from the Run Build Task in the Visual Studio Code menu.
In the menu go to Terminal and choose Run Build Task.
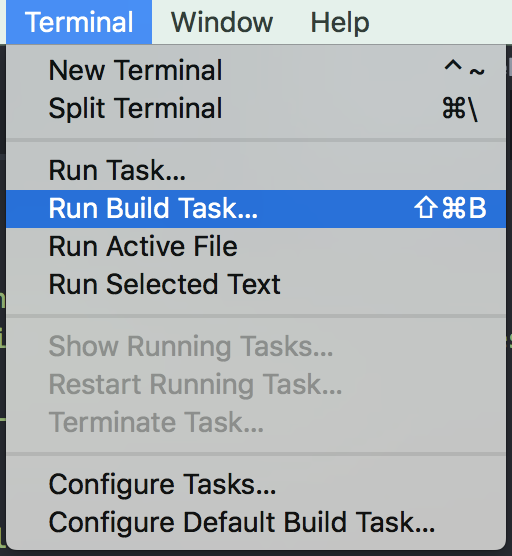
Run Build Task
You can also use Command + Shift + B or CTRL + Shift + B.
That will open Terminal and show you messages from the Apache Royale compiler. Check these messages for any errors and information about the project.
When that is complete you'll see a "compile successful" message:
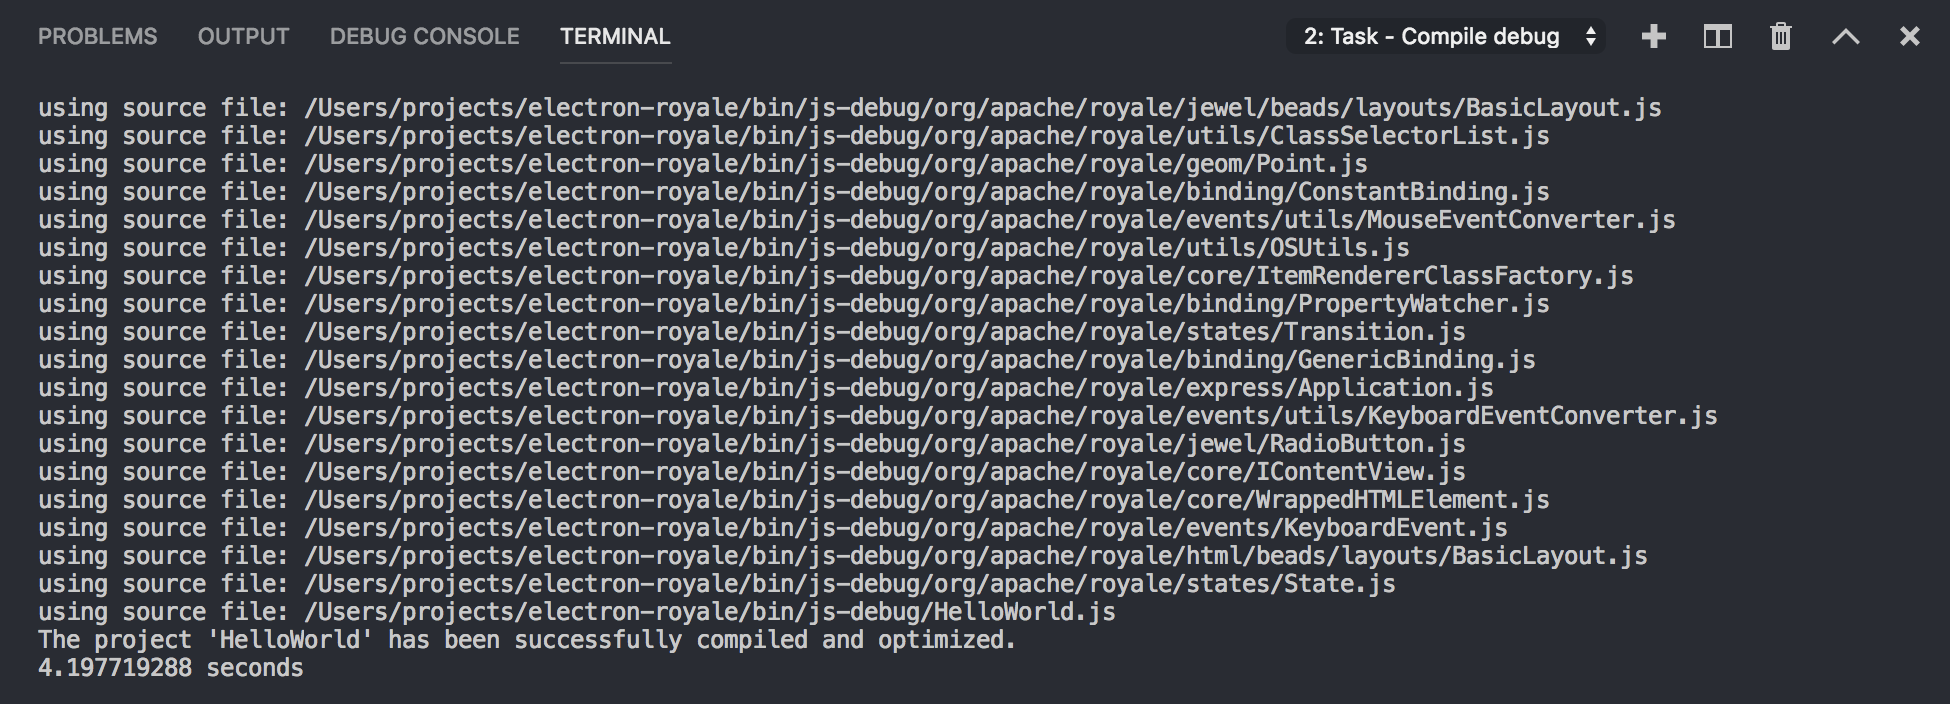
Compile Successful
Congratulations! You will also see a new directory in your project named /bin:
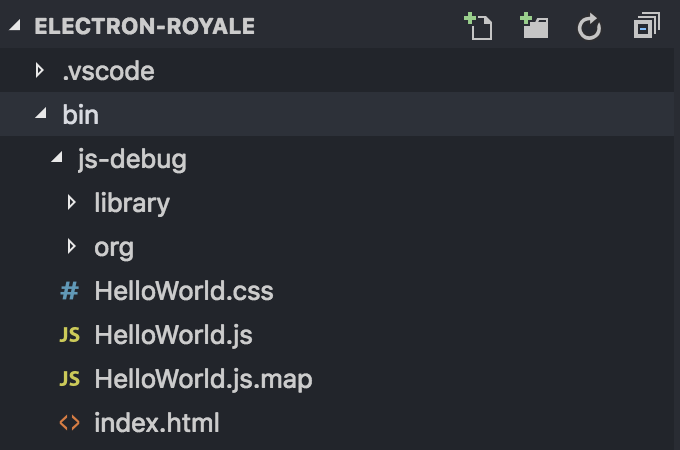
Exported to bin directory
We could open this index page in a browser using the Firefox debugger, but for our Electron app we are not done yet.
If we launched our Electron app now, not the Royale app, it would open the template page because it is still pointing to the index page in the root of our project.
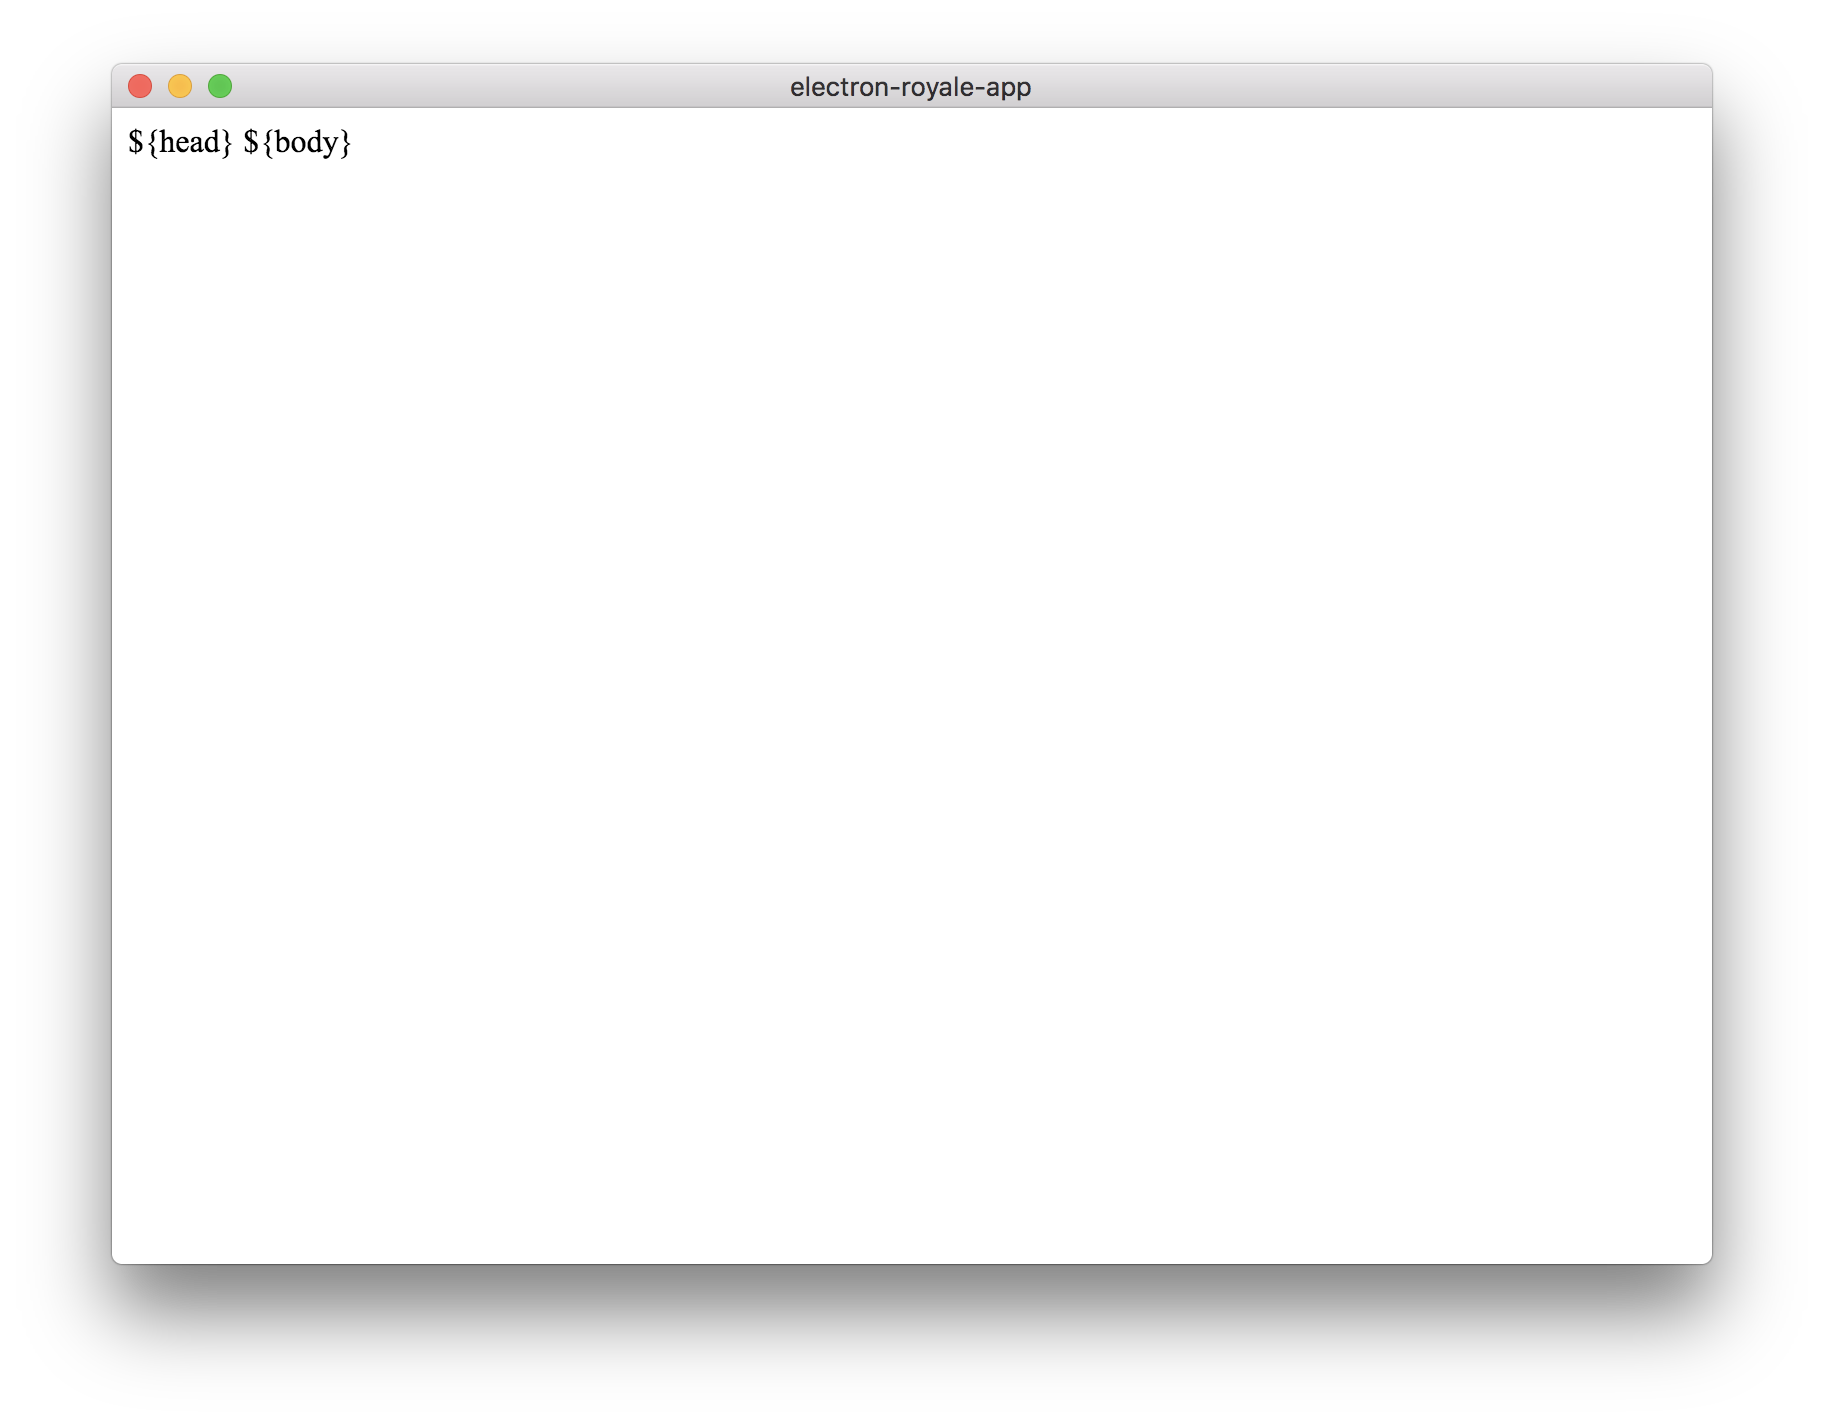
Pointing to the template
The actual Royale application is in bin/js-debug/index.html that is created after we compile HelloWorld.mxml. So we need our Electron app to load in the application page and not the template.
Open main.js and find the line that loads in index.html:
// load the index.html of the app.
win.loadFile('index.html')
Change it to point to our exported Royale application:
// load the Apache Royale index.html
win.loadFile('bin/js-debug/index.html')
Note: We can easily load in different pages in Electron using the loadFile() method. You can use inter-process communication to have an action on your web page load another web page. You'll learn more about this later.
If you've compiled the Royale project successfully and changed the path to load the index.html page in the bin directory, we are ready to start our Electron project.
Open the Debug view and start Launch Electron. Since everything always goes well on the first try you should have a running application:

Royale Hello World
Note: If you the button is missing its theme, check the theme value in the asconfig.json and troubleshoot as mentioned above.
Note: If we make changes to our application and then run the Launch Electron task again we may not see our changes.
In Flash Builder there was an option to Build Automatically that was enabled by default. What this means is your projects were built automatically when you saved the document. Building the application also provided warnings and error messages in the problems view. We can do something similar with a prelaunch task.
Let's add a prelaunch task to build our application before we launch it.
Remember how we named our compile task earlier? We are are going to tell our Electron launch configuration to run the Royale compile task before starting the application.
Open launch.json and add a prelaunch task property and set it to our Compile build task (mentioned in the tasks.json file). The launch.json should look like the following:
{
   "version": "0.2.0",
   "configurations": [
      {
         "name": "Launch Electron",
         "type": "electron",
         "request": "launch",
         "preLaunchTask": "Compile",
         "appDir": "${workspaceFolder}"
      },
      {
         "name": "Debug Main Electron Process",
         "type": "node",
         "request": "launch",
         "cwd": "${workspaceRoot}",
         "preLaunchTask": "Compile",
         "runtimeExecutable": "${workspaceRoot}/node_modules/.bin/electron",
         "windows": {
            "runtimeExecutable": "${workspaceRoot}/node_modules/.bin/electron.cmd"
         },
         "args" : ["."],
         "outputCapture": "std"
      }
   ]
}
Make sure the name is the same. It is case sensitive. We can, of course, add more launch configurations with or without these options at any time.
FYI You can learn about the possible launch attributes and their values by hovering your mouse pointer over them or by going here.
Now launch the application again using either of the two launch configurations.
You'll see that the Royale application is built right before the Electron application is launched. If there are any errors in your Royale app the Electron app will not launch.
Communicating with the Main Process
Electron apps have two primary processes. The Main process and the Renderer process. The Royale application runs in the Renderer process and the Electron application runs in the Main process.
Although the processes are separate you can communicate between them using a variety of methods. Read more about this here and then continue.
For this guide we'll send messages.
Open your "Hello World" mxml application and add a script block below the js Application tag and above the initialView tag:
<fx:Script>
    <![CDATA[

    public function clickHandler(event:Event):void {
        var electron:Object;
        var ipcRenderer:Object;

        // check for electron
        // if we add tag config:"node" to our asconfig we get node code intelligence but error for js:Appliction
        if (window["require"]) {
          electron = window["require"]("electron");
          ipcRenderer = electron.ipcRenderer;
          ipcRenderer.send("mainMessageHandler", "hello");
          ipcRenderer.on("rendererMessageHandler", rendererMessageHandler)
        }
        else {
          helloLabel.text = "Electron is not found";
        }
    }

    public function rendererMessageHandler(event:Object, data:String):void {
        trace("Data received:", data);
        helloLabel.text = data;
    }

    ]]>
</fx:Script>
In the button add a click handler:
<j:Button id="helloButton" text="Hello" x="20" y="20" click="clickHandler(event)"/>When we are running in an Electron app the Renderer process, or the browser window, makes additional objects available. The main ones are electron and ipcRenderer. We will use these for communication.
Sending a message is somewhat like dispatching an event. We can send synchronous and asynchronous messages.
The following example code will dispatch a "sayHello" message with a "hello" value:
// example code
const electron = window["require"]("electron");
const ipcRenderer = electron.ipcRenderer;

ipcRenderer.send("sayHello", "hello");
We are sending a String but we could send an Object. Read more here before continuing.
In our main.js we will add a listener to handle this event. At the end of the main.js document add the following:
const { ipcMain } = require('electron')
ipcMain.on("mainMessageHandler", (event, arg) => {
  console.log(arg);
  var time = new Date().toLocaleTimeString();
  win.webContents.send("rendererMessageHandler", "hello there. it's " + time);
})
Notice the rendererMessageHandler. We have added a listener for this event in HelloWorld.mxml.
Launch the application and click the Hello World button.

Hello World message
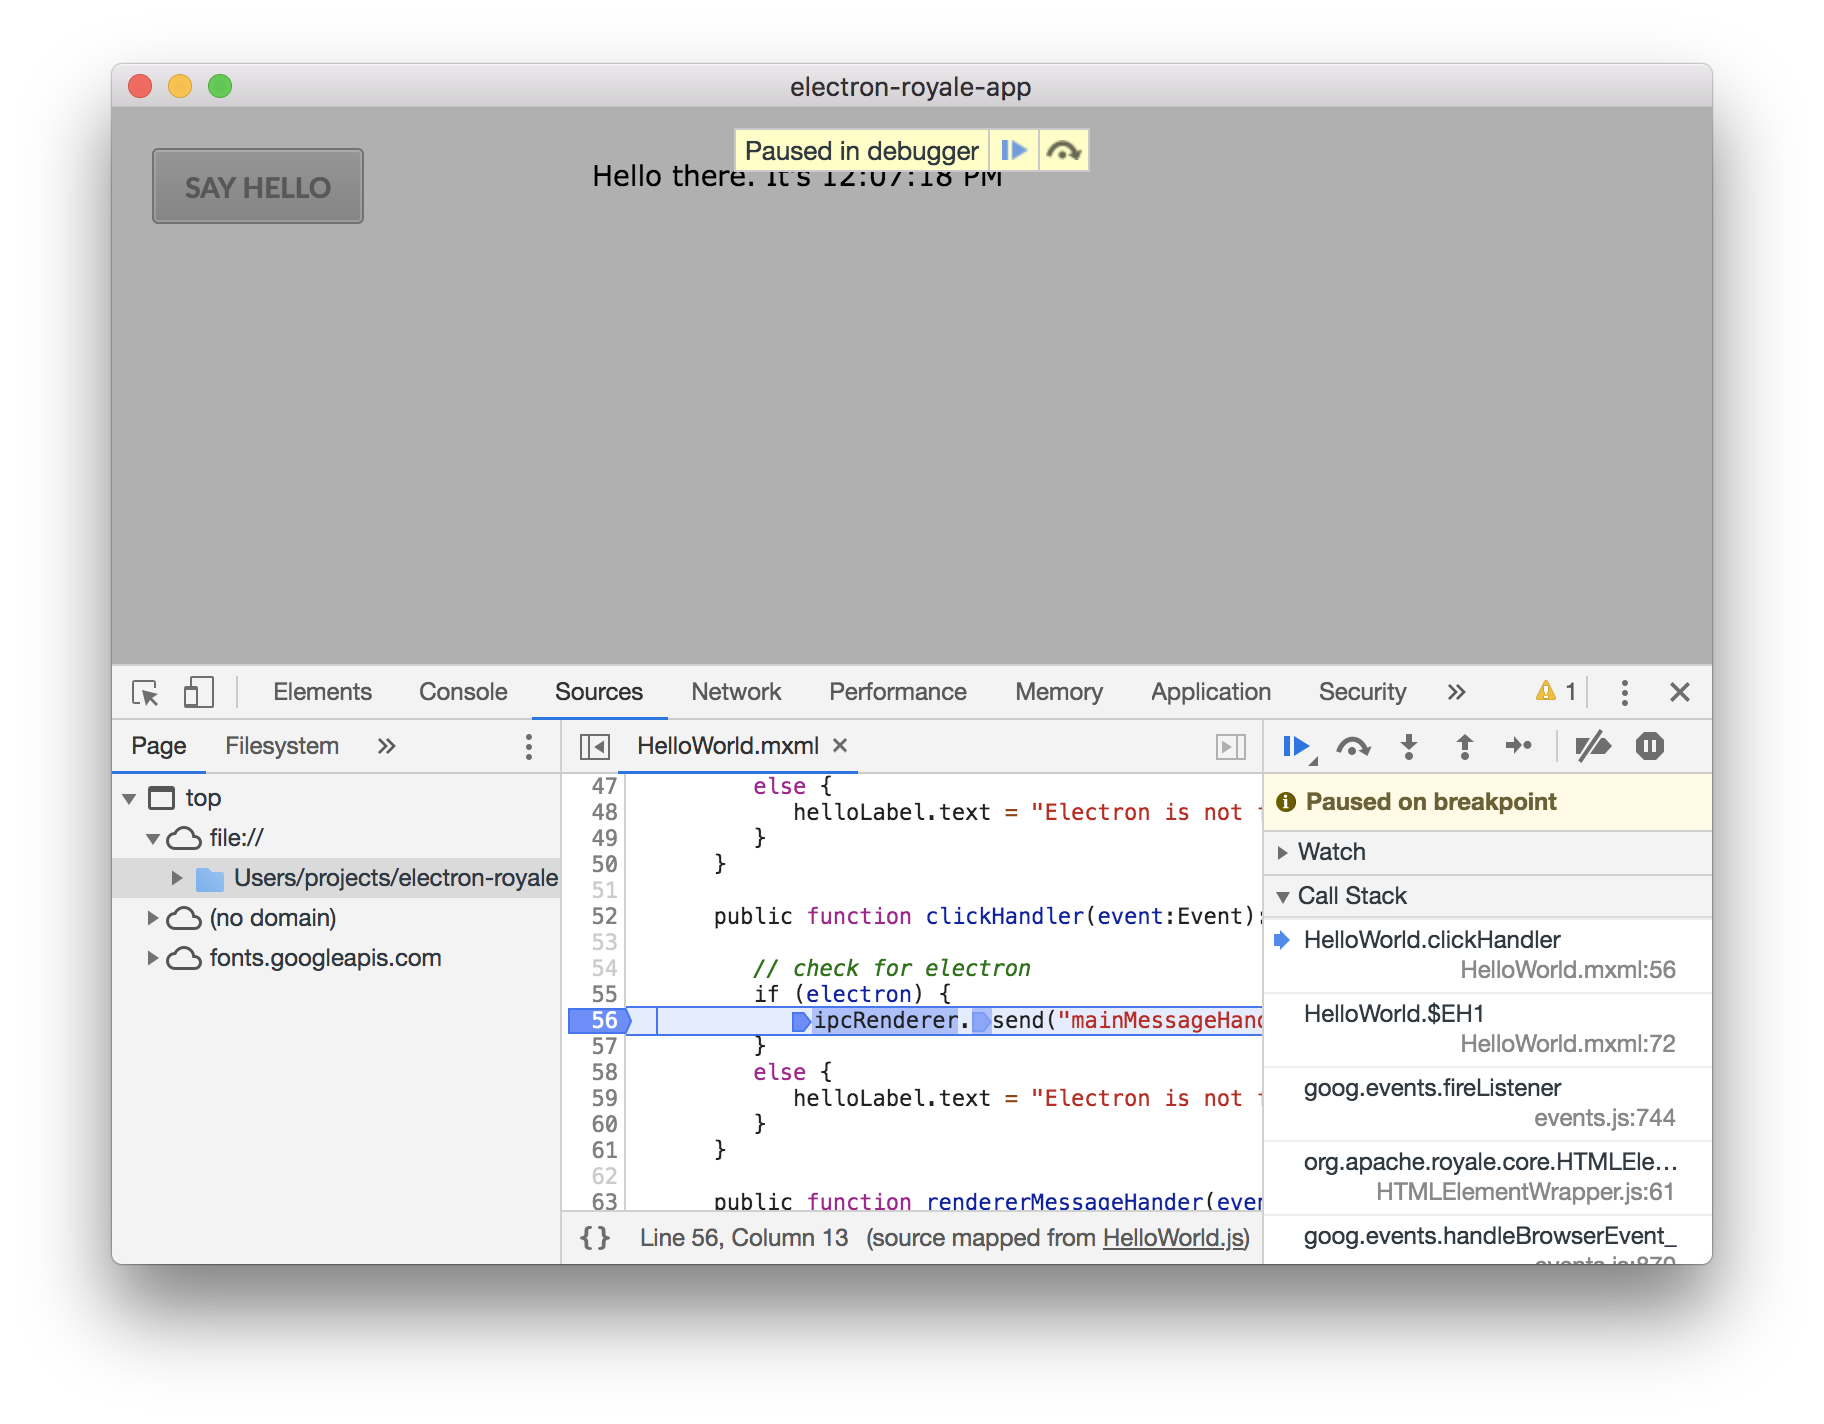
Debugging
To debug the Renderer process, HelloWorld.mxml, add a breakpoint in the button click handler. Open the debug view and click Launch Electron. When you click the Hello button, the debugger opens at that point showing you local variables and classes. Take a minute and review the objects available to your application:
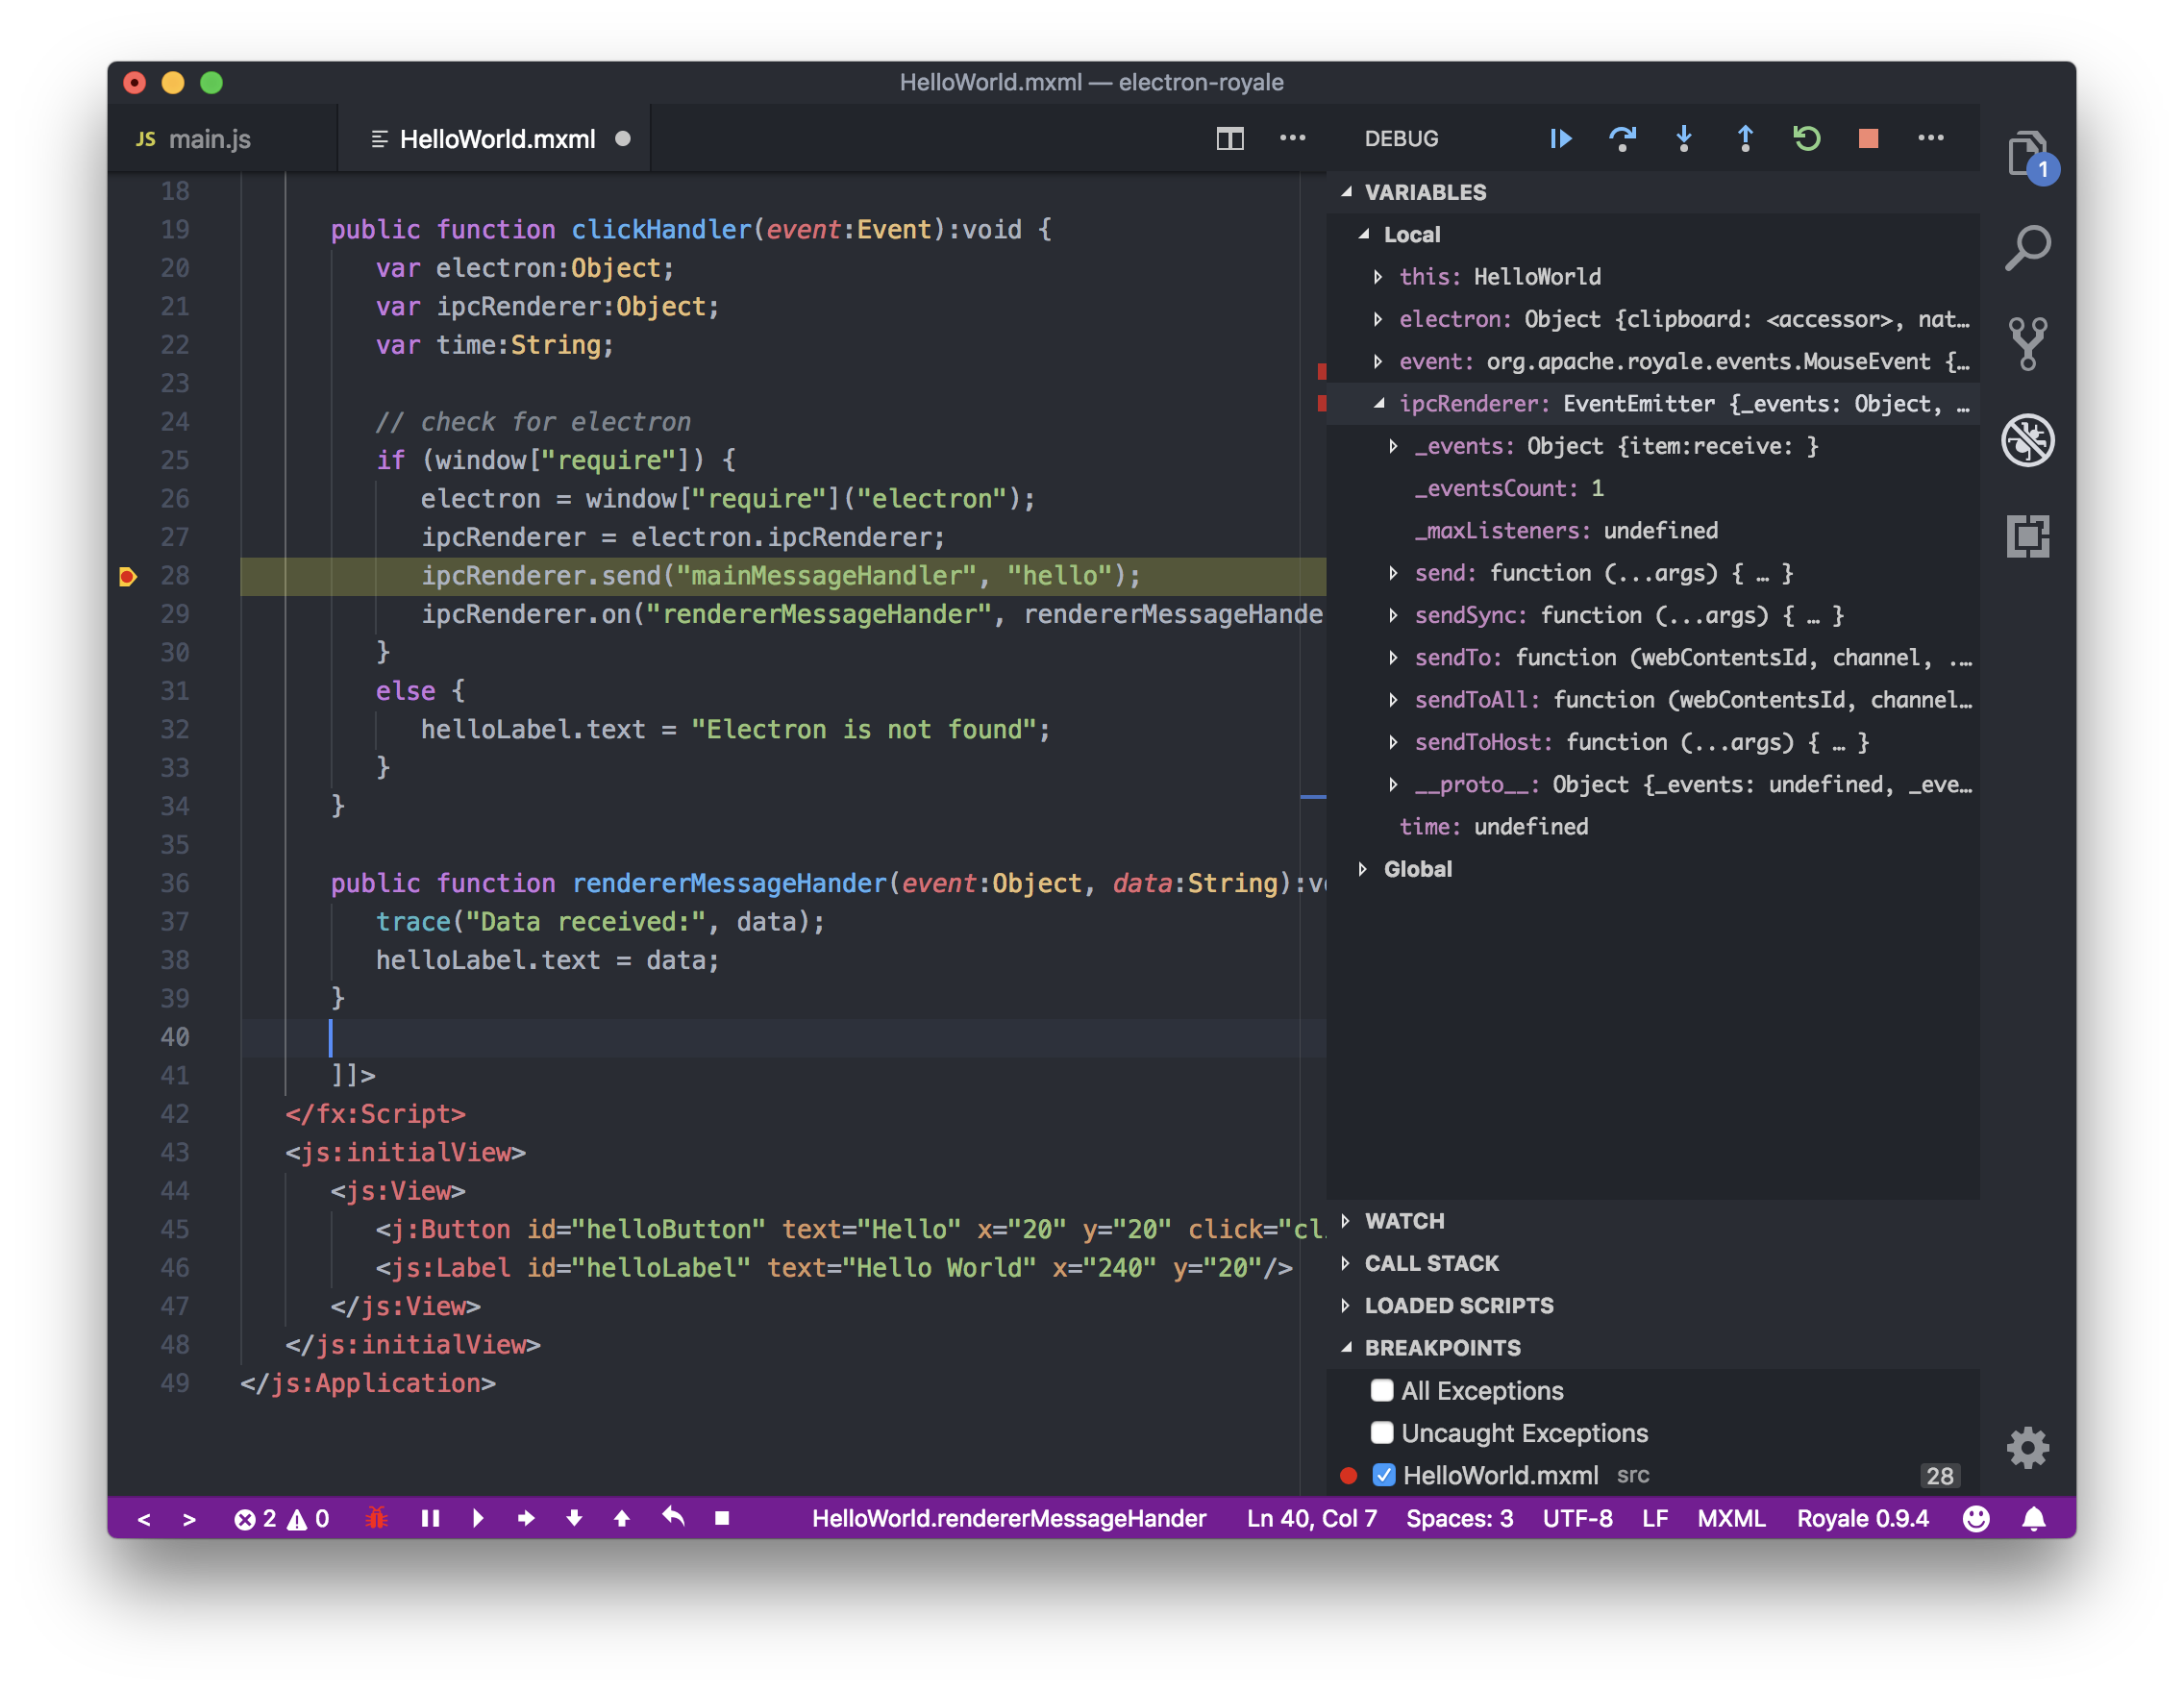
Debug Hello World
To debug the Main process, main.js, add a breakpoint in the mainMessageHandler. Open the debug view and click Debug main Electron process.
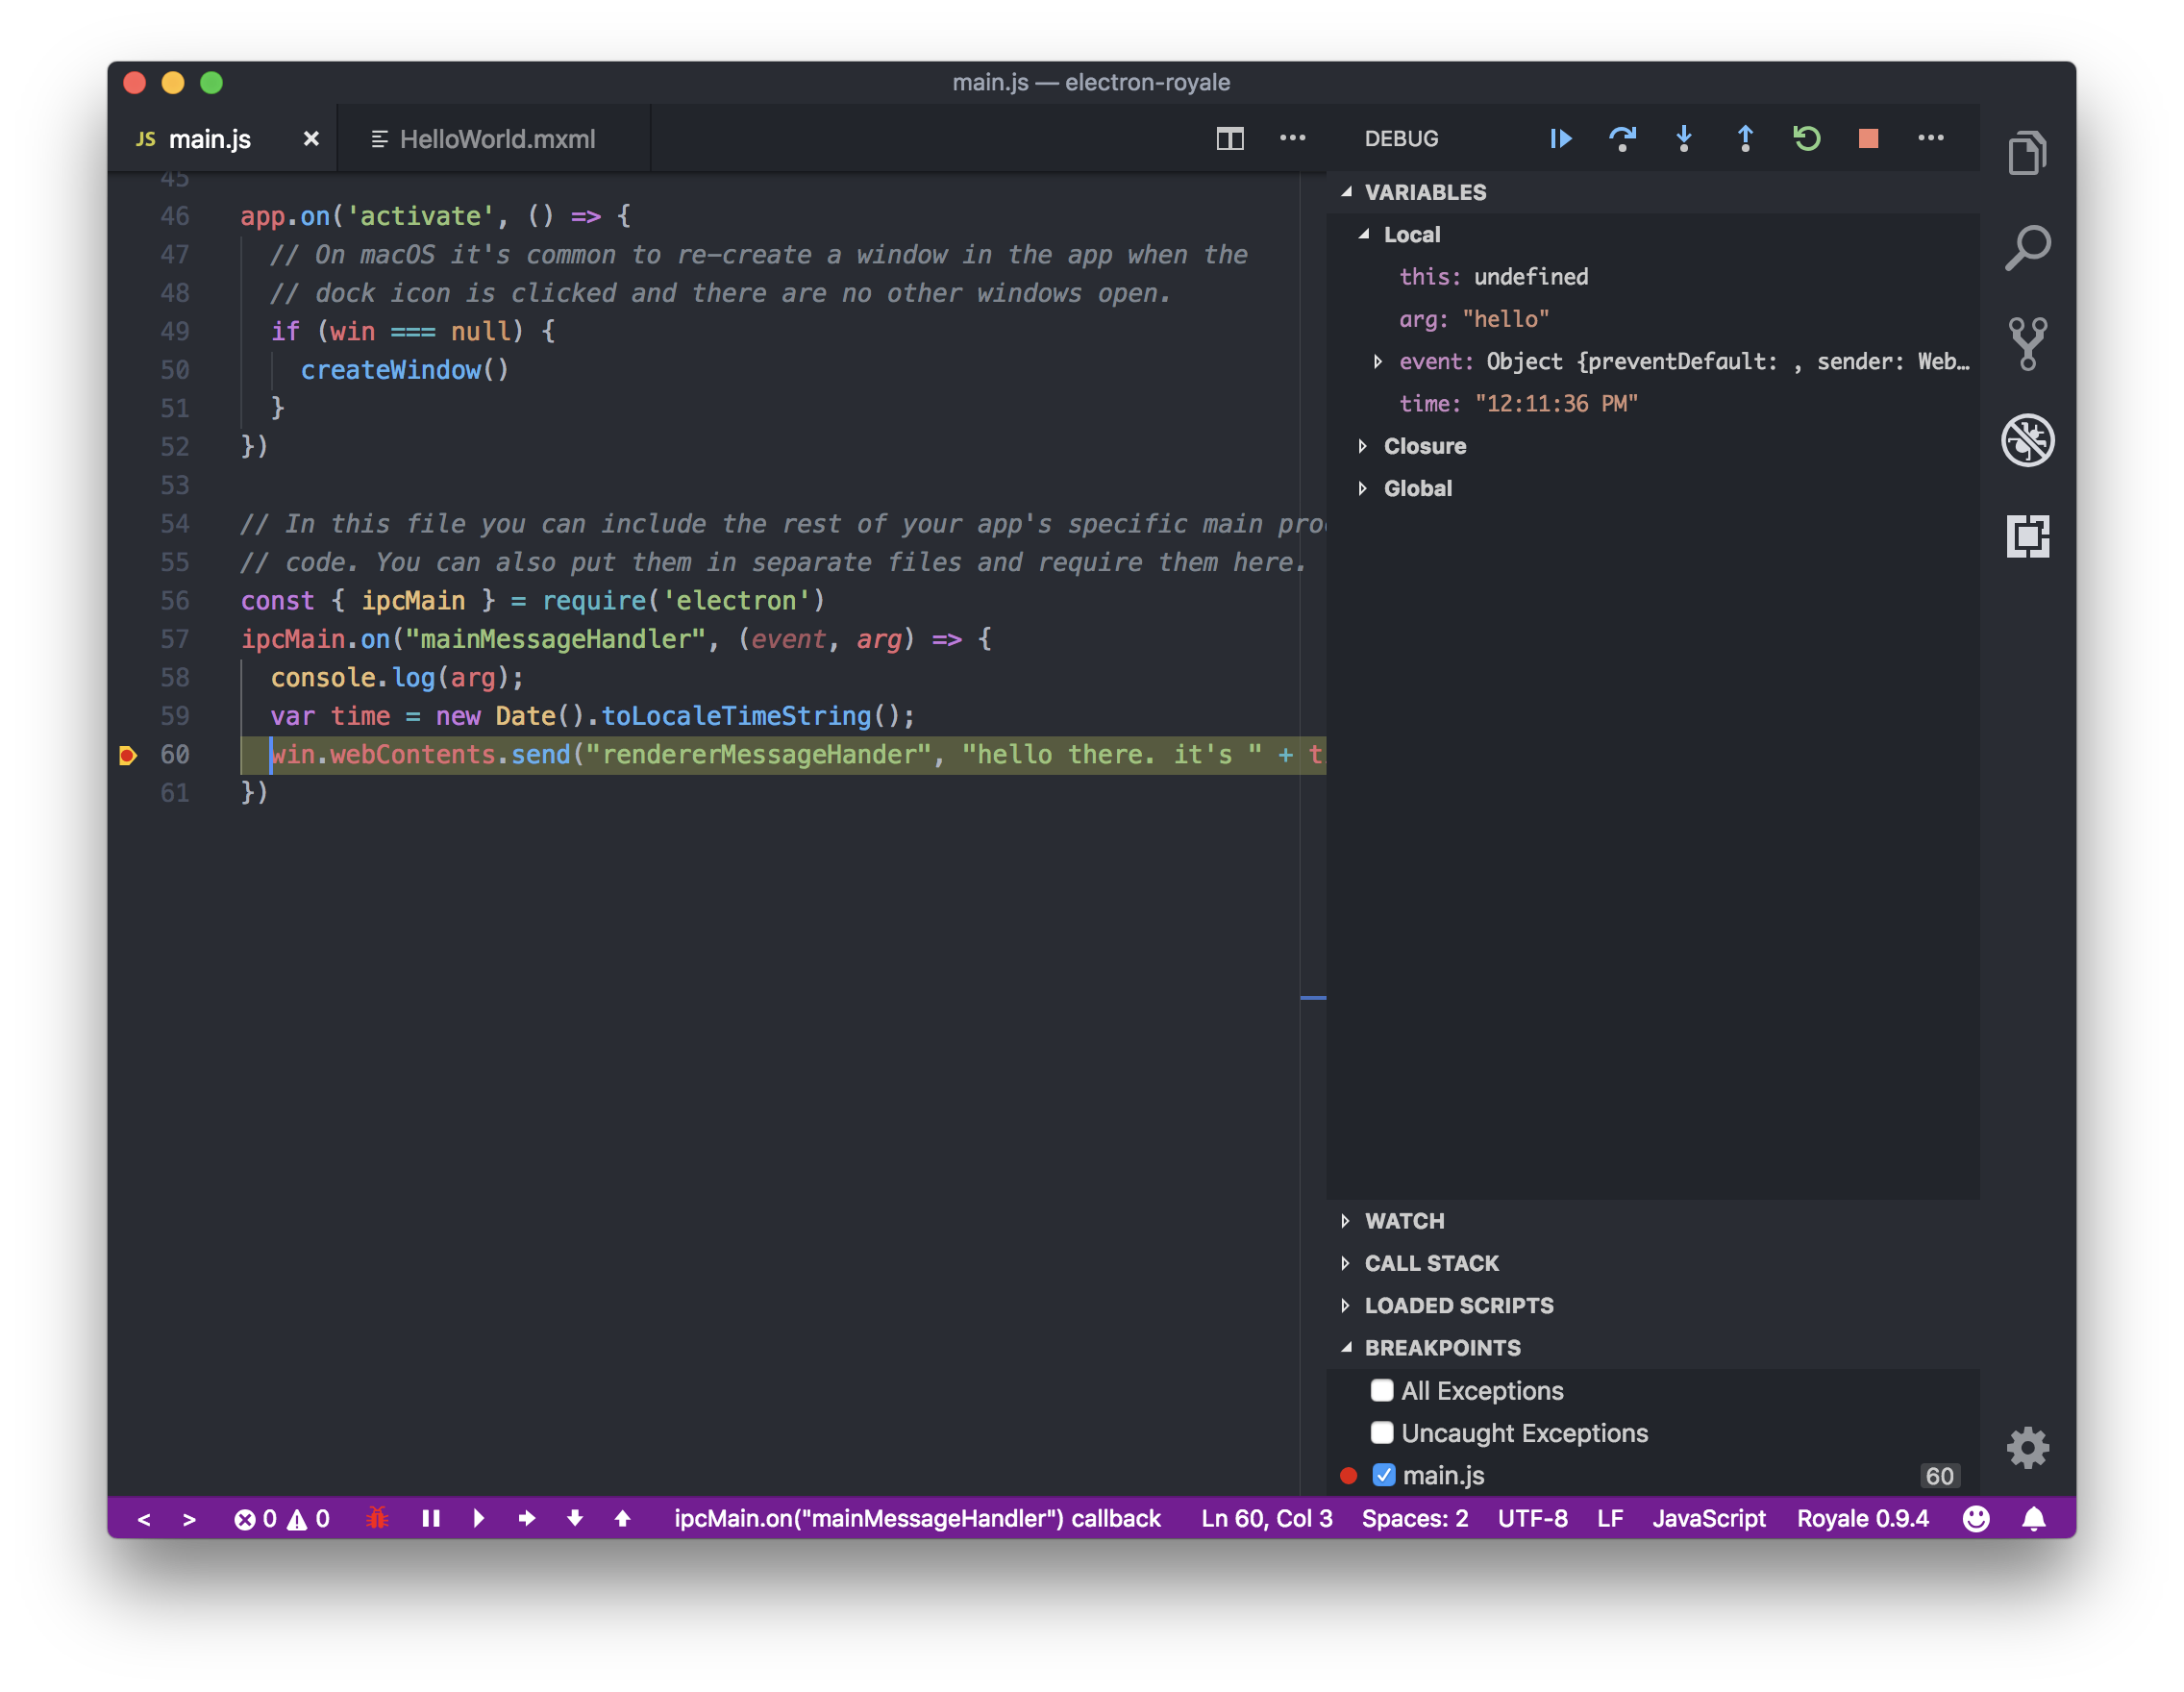
Debug Main
We use the first one to debug the Renderer process and the second to debug the Main process. You can also use the integrated Chrome dev tools mentioned earlier.
Chrome dev tools
Open launch.json. In the first launch configuration notice the type says electron. In the second launch configuration notice the type is node.
Note: This author has not found a way to hit both breakpoints for the Royale application and the Electron app in one session in Visual Studio Code. However, using a combination of the integrated Chrome dev tools (shown above) to set breakpoints you can use the second configuration, Debug main Electron process, to break on both the Royale and Electron processes, but the break occurs in the Chrome Dev tools and not Visual Studio Code. You could also debug the Royale instance only using the Firefox debugger and launching in a browser.
Summary
In this guide you've created a desktop application using Royale and Electron. You've sent a message to the Main process and sent that message back to the Renderer process. You've set a break point in the debugger.
The example project is attached here: Apache Royale Electron zip
If you use the Moonshine IDE, an example project is available here.
Next Steps
- The Wiki has more information on the AS3 & MXML plugin here
- Electron documentation here and here
- Sample Electron apps here
- ipcMain and ipcRenderer
- Apache Royale Getting Started here
- Install the Firefox Debugger and debug Royale in the browser
- Electron Hello World Walkthrough on YouTube here
- Learn the Apache Royale components and layouts with Tour of Jewel here
- Join the Apache Royale Mailing Lists
Contributions
Thanks to the work of numerous individuals and projects in the Apache Royale community.